As an expert in small engine maintenance with years of hands-on experience, I understand the importance of keeping your lawn mower in top condition.
In this guide, I’ll show you how to clean your lawn mower’s air filter, a crucial task for maintaining engine health and efficiency. A well-maintained air filter not only ensures optimal performance but also extends the life of your mower.
This article is designed to provide you with straightforward, practical steps to help you achieve this, backed by my expertise in the field. Read on to learn how to keep your mower running smoothly with a clean air filter.
Quick Summary
- The process of maintaining a lawn mower involves safely disconnecting the spark plug, removing and inspecting the air filter, and then cleaning or replacing it based on its condition.
- To maintain a lawn mower’s performance and longevity, it’s crucial to regularly clean or replace its air filter.
- Proper air filter maintenance can boost a lawn mower’s fuel efficiency by up to 6%.
- In my experience, investing time in air filter maintenance significantly enhances the mower’s efficiency and helps avoid costly repairs.
Step By Step Guide To Clean Lawn Mower Air Filter
- Stop the Mowing Process and Ensure Safety
- Access the Air Filter
- Inspect the Air Filter
- Clean the Foam Filter (if applicable)
- Air-Dry the Foam Filter
- Clean the Air Filter’s Housing
- Reinsert the Air Filter
- Reattach the Cover
- Reconnect the Spark Plug
Halt the Mowing Process
Before I touch the air filter, I make sure to stop the lawn mower and disconnect the spark plug. This prevents the engine from accidentally starting while I’m working on it.
Unplug the Spark Plug
To ensure your safety and prevent the engine from accidentally starting, always disconnect the spark plug before attempting to clean the lawn mower’s air filter.
Here’s how I go about it:
- Locate the Spark Plug: Begin by identifying the spark plug on your mower. It’s typically easy to find, connected to a thick rubber boot and prominently located on the engine.
- Pull the Boot to Expose the Plug: Firmly grasp the boot that covers the spark plug. Gently pull the boot to expose the spark plug beneath it. Make sure to maintain a firm grip to avoid damaging any parts.
- Detach the Spark Plug: Carefully pull the spark plug away from the engine to detach it. This step should be done gently to prevent any damage to the spark plug or the engine.
- Interrupt the Power Circuit: By removing the spark plug, you effectively interrupt the mower’s power circuit. This critical step ensures that there is no risk of the engine accidentally starting up while you’re working on the mower.
- Proceed with Maintenance Safely: With the spark plug disconnected, you can now confidently proceed to clean the air filter or perform other maintenance tasks on your mower, knowing that there’s no danger of an unexpected engine start.
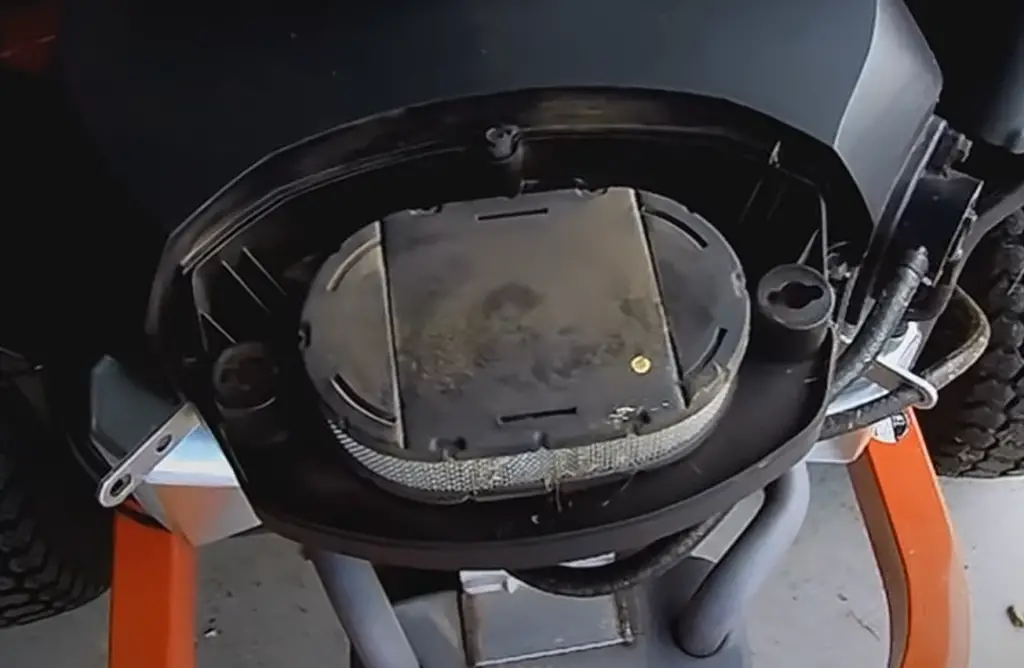
Detach the Air Filter Cover
Once the spark plug is disconnected, I proceed to remove the air filter cover by locating the fasteners that hold it in place. Typically, these are either clips, screws, or bolts, depending on my lawn mower model.
For clips, I simply unhook them with my fingers. If it’s screws or bolts, I grab a screwdriver or a wrench and gently loosen them until the cover comes free. I’m careful not to apply too much force to avoid stripping the screws or damaging the cover.
Once the fasteners are loose, I lift off the cover and set it aside. It’s important to keep all parts in a safe place where they won’t get lost or damaged while I’m working on the air filter.
Now the filter is exposed and ready for inspection and cleaning.
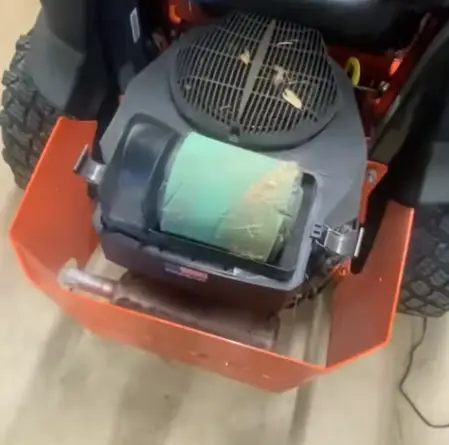
Extract the Air Filter
With the air filter cover set aside, I gently pull out the air filter, taking care not to dislodge any debris into the carburetor. It’s crucial to keep any dirt from entering the engine, as even a small particle can cause damage or affect performance.
Here’s what I focus on:
- I inspect the air filter for any visible damage or excessive dirt. If it’s damaged or very dirty, I’ll need to replace it rather than clean it.
- I handle the air filter carefully to prevent tearing or further wear. This ensures its longevity and effectiveness.
- I make a mental note of the filter’s orientation to ensure a hassle-free reinstallation after cleaning or replacement.
Purify the Foam Filter
Having removed the air filter, I now focus on purifying the foam element to ensure it functions optimally when the mower is back in action.
I start by lightly tapping it to shake off loose dirt. Then, I squeeze it to wring out any old oil and debris. I avoid twisting, as that can tear the foam.
Next, I wash it with a mild detergent and warm water, kneading gently to remove dirt. After rinsing thoroughly until the water runs clear, I press it between towels to extract excess moisture. It’s important not to wring it out, as this can also cause damage.
Once the filter is merely damp, I re-oil it lightly, ensuring even coverage for the best filtration when I resume mowing.
Air-dry the Foam Filter
I set the freshly cleaned foam filter aside to air-dry completely before reinstalling it in my lawn mower.
It’s crucial to ensure it’s fully dry to prevent any moisture from getting into the engine, which could cause damage. Here’s how I make sure it dries properly:
- Find a Well-Ventilated Area: I place the filter in a spot with good airflow, away from direct sunlight, which could degrade the material.
- No Artificial Heat: I resist the urge to speed up the process with a hair dryer or heater, as this can warp or shrink the foam.
- Patience is Key: I give it ample time, usually a few hours, to air-dry on its own. Rushing this step can lead to potential engine issues.
Lubricate the Foam Filter
Once the foam filter is completely dry, it’s time to lightly coat it with clean engine oil to ensure proper filtration and engine performance. I make sure to use a high-quality oil that’s recommended for my lawn mower’s engine.
I pour a small amount onto the filter and then gently squeeze it to distribute the oil evenly throughout the foam. It’s important not to over-saturate the filter as that can restrict airflow and cause engine issues.
After I’ve got an even coating, I’ll wring out any excess oil to prevent drips. Finally, I fit the lubricated filter back into its housing, ready for another round of mowing.
This simple step helps my mower run smoothly and efficiently.
Scrub the Air Filter’s Housing
Before resuming lawn mowing, it’s crucial to scrub the air filter’s housing to remove any dirt or debris that could compromise the airflow and engine efficiency. I make sure to take the following steps to thoroughly clean the housing:
- I use a dry brush to loosen any caked-on dirt, being careful not to damage any components inside the housing.
- Next, I take a damp cloth and wipe the inside walls to collect the dislodged dirt. This step ensures that I’m not just moving the debris around but actually removing it.
- Finally, I dry the housing with a clean towel to prevent any moisture from lingering, which could potentially cause issues down the line.
With the housing clean, I’m ready to insert a fresh air filter and get back to mowing with confidence.
Insert Back the Air Filter
Having cleaned the housing, it’s now time to carefully reinsert the air filter to ensure the lawn mower runs smoothly.
I make sure that the filter is completely dry and free of debris before I start.
I take the air filter and align it correctly with the housing; it’s essential that it fits snugly without any gaps.
Next, I push it firmly into place, feeling for any obstruction or misalignment. Once it’s seated properly, I replace the cover, securing any clips or screws that hold it in place.
Finally, I double-check that everything is tight and secure because a loose cover could let in dirt and defeat the purpose of the clean filter.
Reattach the Cover
With the air filter securely in place, I now turn my attention to reattaching the cover, effectively pausing the mowing process to ensure my mower remains in top condition.
It’s a simple task, but it’s crucial for protecting the filter and ensuring my mower runs smoothly. Here’s how I do it:
- Align the Cover: I make sure the cover is properly aligned with the housing. It’s important that it fits snugly to prevent any debris from getting inside.
- Secure Fasteners: I carefully replace any screws or clips that hold the cover in place. I check that they’re tight but not overly so, to avoid cracking the cover.
- Double-check: Lastly, I give the cover a gentle tug to ensure it’s secure. I don’t want it coming loose when I’m back to mowing.
Reconnect the Spark Plug
Now that the air filter cover is back in place, I’ll proceed to reconnect the spark plug, which is the next critical step in resuming my lawn mowing.
First, I make sure the area around the spark plug is clean to prevent debris from falling into the combustion chamber.
I then take the spark plug wire and carefully align it with the plug. With a firm push, I feel the connector snap onto the spark plug, ensuring a secure fit.
It’s crucial not to force it, as that can damage the wire or the plug.
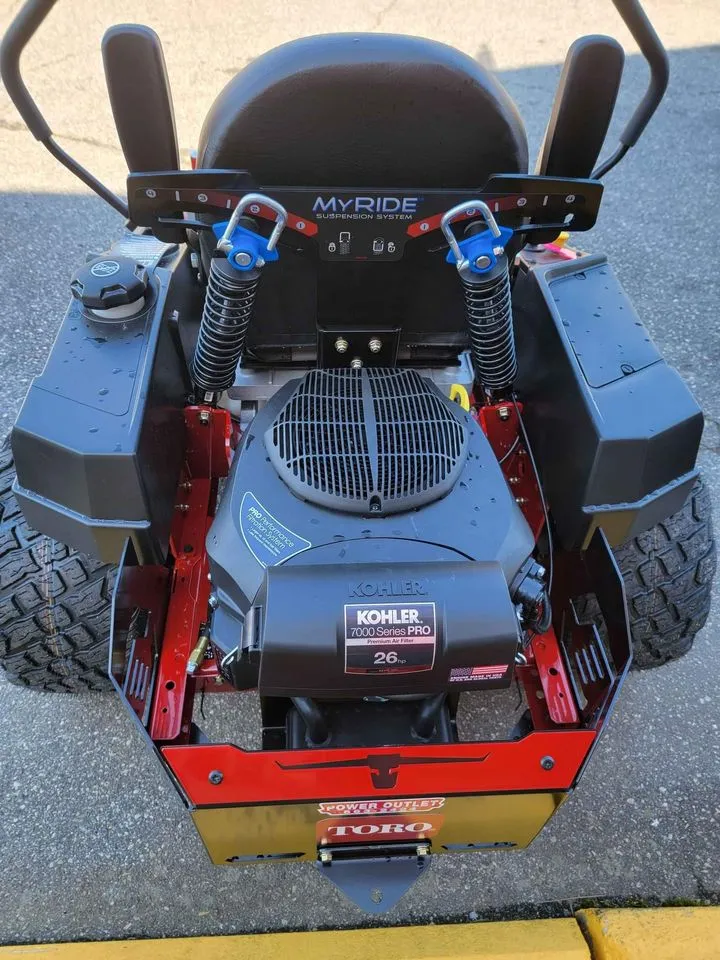
Inspecting the Lawn Mower Air Filter
Before I tackle the cleaning, I need to check the state of my lawn mower’s air filter.
It’s crucial to identify if it’s simply clogged or beyond redemption.
I’ll look for signs of wear and tear that could signal it’s time for a replacement.
Symptoms of a Dirty Air Filter
Recognizing the symptoms of a dirty air filter can help in timely maintenance. Signs include decreased engine performance, engine stalling, poor fuel economy, backfiring, black smoke from the exhaust, and engine overheating.
These symptoms arise due to the restricted airflow caused by a clogged filter, which can strain the engine and reduce its efficiency.
Regularly checking and cleaning your lawn mower’s air filter can prevent these issues, ensuring smoother operation and prolonging the life of the engine
Actions for a Dirty Air Filter
Upon discovering that your lawn mower’s performance is waning, the first action to take is to inspect the air filter for dirt and debris. A clogged air filter can significantly hamper the engine’s efficiency.
Here’s what I usually do:
- Remove the Air Filter: I gently take out the air filter, being careful not to damage it or let any dirt fall into the carburetor.
- Examine the Filter: I look closely to see if the filter’s simply dirty or if it’s damaged. Dirt’s fixable, but damage means replacement.
- Decide on Cleaning or Replacement: If it’s just filled with grass clippings and dust, I clean it. But if I find tears or excessive wear, it’s time for a new one to ensure my mower runs smoothly.
Comparing Foam and Paper Filters
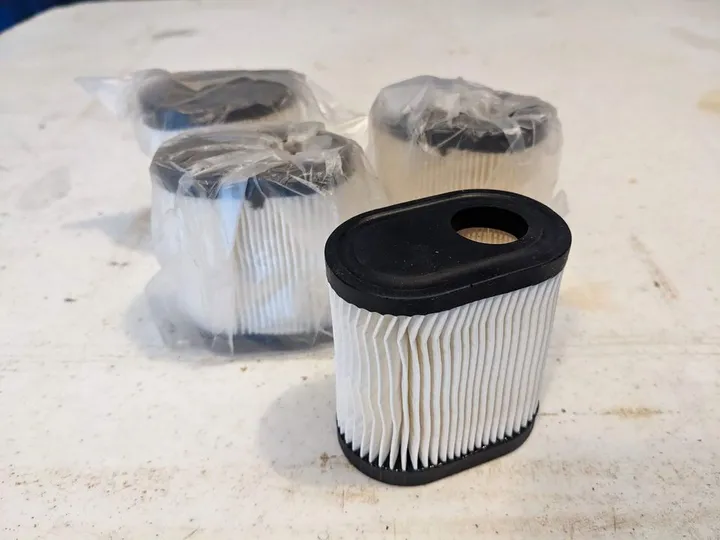
When selecting an air filter for your lawn mower, it’s crucial to understand the differences between foam and paper filters in terms of performance and maintenance.
Foam filters, typically made of polyurethane, are known for their durability and ability to be cleaned and reused. They’re often oiled to trap even the smallest particles.
However, they do require regular maintenance to prevent clogging and maintain airflow.
On the other hand, paper filters offer a pleated design that provides a larger surface area to capture debris. They’re usually more efficient at filtering than foam when they’re new, but they can’t be cleaned like foam filters.
Once a paper filter is dirty, it’s time to replace it, which means they’re less eco-friendly and potentially more costly in the long run if you’re using your lawn mower frequently.
I’ve found that for a balance between cost-effectiveness and maintenance, you might prefer a dual-system that uses both foam and paper elements. This combination can offer the reusability of foam with the enhanced filtering capability of paper.
Ultimately, the choice boils down to personal preference, the environment where you’ll be mowing, and how diligent you’ll be with maintenance.
Different Cleaning Techniques for Paper and Foam Filters
Paper and foam air filters require different cleaning approaches. Paper filters, made of compressed fibers, are more delicate and can easily be damaged. Cleaning these filters should be done gently to avoid compacting the fibers and reducing their effectiveness.
On the other hand, foam filters are more durable and can endure a thorough wash. They are often used as pre-filters to trap larger debris. Knowing the specific cleaning method for the type of filter your mower uses is crucial for effective maintenance.
For paper filters, gentle tapping to remove dirt is recommended, while foam filters can be washed with a mild detergent.
Air-Fuel Ratio and Its Importance
The air-fuel ratio (AFR) is critical for the efficient operation of lawn mower engines, typically maintained at around 14.7:1. A clean air filter is vital in preserving this ratio.
When an air filter becomes clogged with dirt, it can disrupt this balance, leading to decreased engine performance and starting difficulties.
A dirty filter restricts airflow, causing the engine to run rich (more fuel than air) or lean (more air than fuel), both of which can adversely affect engine performance and longevity.
Regular maintenance of the air filter ensures the engine receives the right air-fuel mixture for optimal combustion and efficiency
Specific Maintenance for Different Engine Sizes
Lawn mower engines vary in size, and so do their air filter requirements. Smaller engines, such as those found in push mowers, usually employ thin, small air filters. These engines don’t require much airflow due to their low horsepower.
Conversely, larger engines (12 to 17 HP) in riding mowers demand larger, more robust air filters. Understanding the specific needs of your mower’s engine size is crucial for appropriate filter maintenance.
Larger engines will generally require more frequent cleaning and replacement of air filters due to their higher air intake requirements
Common Mistakes to Avoid
When cleaning lawn mower air filters, it’s crucial to avoid common mistakes that can lead to further complications.
For instance, using the wrong type of oil on foam filters can hinder airflow, and improper cleaning of paper filters can embed dirt deeper into the filter material.
Always use air filter-specific oil for foam filters and be gentle when cleaning paper filters to avoid damaging the delicate fibers. Such attentiveness ensures the longevity and efficiency of the air filter, thereby maintaining the mower’s overall health
Our Verdict
In my journey through maintaining various lawn mowers, I’ve come to realize just how pivotal a role the air filter plays. It’s not just another part; it’s the key to keeping your mower running smoothly and efficiently.
Through years of hands-on experience, I’ve learned that a little effort in cleaning or replacing the air filter can bring significant gains in performance and longevity.
Whether it’s a foam or paper filter, each has its own quirks and care methods, and understanding these nuances has made a world of difference. Regularly checking and cleaning the air filter is not just a chore; it’s an investment in your mower’s health.
So, from one mower enthusiast to another, trust me when I say that dedicating a few minutes to this simple task can save you not just headaches but also a considerable amount in potential repairs.
Keep your mower humming with just a bit of tender loving care – it’s truly worth every minute!
Frequently Asked Questions
How often should I replace my lawn mower air filter, as opposed to just cleaning it?
I should replace my lawn mower air filter every one to three years, depending on its condition and how frequently I use my mower. Regular cleaning extends its life but can’t replace wear.
Can I use household items to clean my lawn mower’s air filter effectively if I don’t have specialized cleaning solutions?
I’ve found that mild dish soap and water can effectively clean my lawn mower’s air filter, especially if I don’t have access to any commercial cleaners. It’s a simple and cost-effective method.
Are there any signs of wear and tear on the air filter that I should look for that indicate it’s time for a replacement?
I’ll check for tears, excessive dirt, or a misshapen form in my air filter, since these signs usually mean it’s time to replace it rather than just clean it.
How does a dirty air filter affect the performance and longevity of my lawn mower?
A dirty air filter can choke my lawn mower’s engine, reducing its power and efficiency. Over time, it’ll strain the motor, potentially shortening the mower’s life if I don’t clean or replace it.
Is it necessary to prepare my lawn mower in any specific way before reinstalling the cleaned or new air filter to ensure optimal performance?
I make sure the air filter compartment is clean and free of debris before slotting in the new filter. It ensures my mower runs smoothly and prevents any immediate clogging of the fresh filter.