
Proper steering is crucial for the optimal performance of your Husqvarna zero turn mower, ensuring precise cuts and efficient navigation.
This comprehensive guide will cover everything from how to adjust steering on Husqvarna zero turn mowers, to identifying common issues and maintaining your mower for peak steering performance.
Get ready to master the art of steering your Husqvarna zero turn mower like a pro!
Key Takeaways
- Adjusting the steering on a Husqvarna zero turn mower involves safety measures like turning off the engine and disconnecting the spark plug before inspecting and adjusting steering levers and tire pressure.
- Steering levers must be checked for alignment and even height; control rods connected to these levers are then adjusted by loosening lock nuts and turning the rods until levers are symmetrical.
- Steering dampers, which absorb shocks and provide smooth operation, should be inspected for wear and adjusted or replaced if necessary, ensuring they are securely mounted and functioning.
- After adjustments, a test drive is essential to confirm responsive steering, followed by a final check to ensure all components are secure, maintaining regular maintenance for optimal performance.
Step-by-Step Guide to Adjusting Steering on Husqvarna Zero Turn Mower
Safety First
- Ensure the mower is on a level surface.
- Engage the parking brake.
- Turn off the engine and remove the key to prevent accidental starting.
- Disconnect the spark plug wire to ensure the mower cannot start.
Inspect Steering Levers
- Check for looseness or misalignment in the steering levers.
- Make sure the levers are at the same height and adjust if necessary.
Check Tire Pressure
- Verify that all tires are inflated to the recommended pressure, typically 60 kPA (0.6 bar/8.5 PSI) for Husqvarna mowers.
Adjust Steering Levers
The necessary steps: From checking lever symmetry and accessing the control rods, to adjusting and securing them for improved handling.
1. Identify Lever Discrepancy
- With the mower turned off and on a level surface, place the steering levers in the neutral (centered) position.
- Observe the levers to see if one lever protrudes more than the other; they should be even and at equal heights.
2. Access Control Rods
- The control rods connect the steering levers to the mower’s transmission. Locate these rods; they typically have adjustment points in the form of threaded rods with lock nuts.
3. Loosen Lock Nuts
- Using the appropriate wrenches, loosen the lock nuts on the control rods just enough to allow for adjustment. Do not remove the nuts completely.
4. Adjust Control Rods
- To align the steering levers, turn the adjustment section of the control rods. Rotating it one way will extend the rod, while rotating it the other way will shorten it.
- Adjust each rod incrementally, alternating between the two, until the levers are symmetrical and move together evenly.
5. Tighten Lock Nuts
- Once the levers are properly aligned, retighten the lock nuts securely to ensure the adjustment holds during operation.
- Make sure the levers move freely and do not bind or stick after the adjustment.
6. Confirm Lever Alignment
- After tightening, recheck the lever positions. They should still be even, and the mower should respond correctly when you push both levers forward or pull them back.
Read More: Husqvarna Zero Turn Steering Problems
Adjust Steering Dampers
From checking for wear to testing for resistance, these steps are critical in maintaining the integrity of your mower’s handling capabilities.
1. Locate Steering Dampers
- Find the steering dampers; they’re usually located near the base of the steering levers and attached to the mower’s frame.
2. Inspect Dampers
- Check the dampers for any visible signs of wear, leakage, or damage. If they’re compromised, they should be replaced rather than adjusted.
3. Adjust Damper Tension (if applicable)
- Some steering dampers have an adjustment valve that allows you to tweak the tension. If your model has this feature, refer to the owner’s manual to understand the correct procedure and settings.
- If they do not have a tension adjustment, you can only ensure they are securely mounted and functioning as intended.
4. Replace if Necessary
- If the dampers are damaged, you’ll need to remove them. This usually involves unbolting them from their mounting points.
- Install new dampers, securing them in place with the bolts you removed, and ensure they’re properly connected to the steering levers.
5. Test Dampers
- Before putting everything back together, manually test the dampers by moving the steering levers back and forth, feeling for consistent resistance and smooth operation.
- Watch for any erratic movement or lack of resistance, which could indicate improper installation or a faulty damper.
Test and Fine-Tune
- Reconnect the spark plug wire.
- Start the mower and test the steering response.
- Make further adjustments if needed to ensure responsive and even steering.
Final Check
- Once satisfied with the steering response, turn off the mower.
- Double-check all fasteners for tightness.
- Perform a visual inspection to ensure everything is properly aligned and secure.
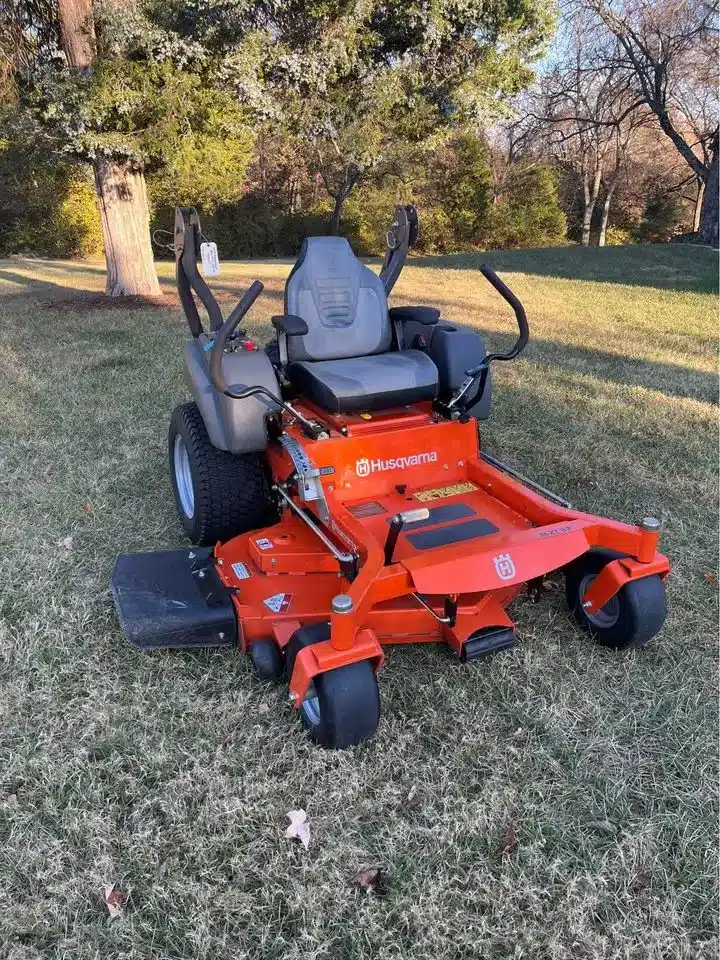
Understanding the Steering System of Husqvarna Zero Turn Mowers
The steering system in Husqvarna zero turn mowers consists of three main components:
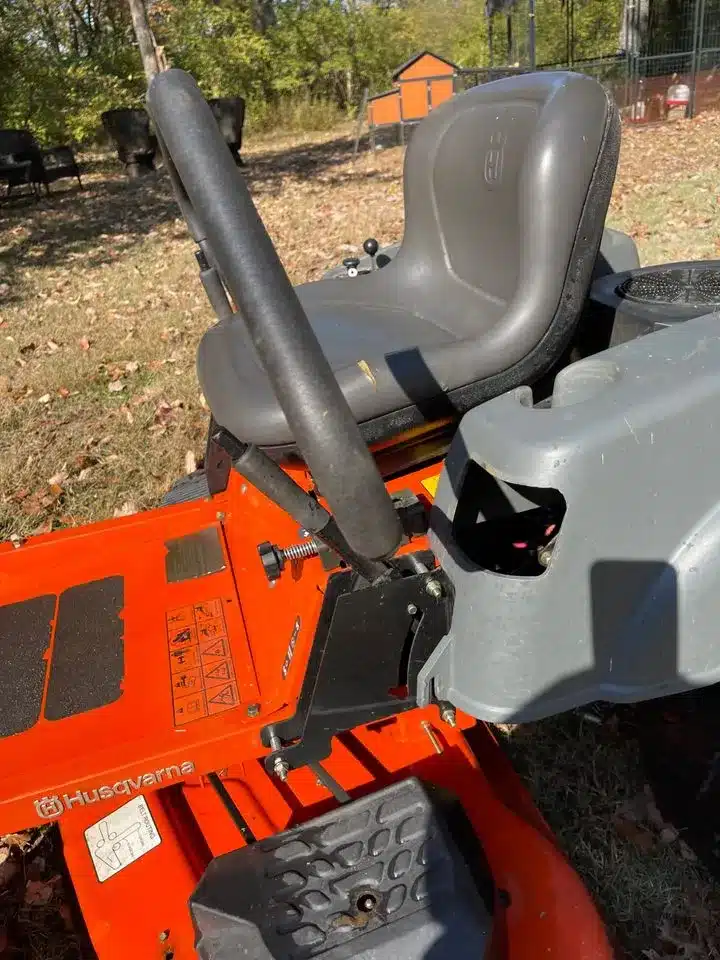
- Steering Levers: These provide precise control and enable the mower to rotate around its own axis, allowing for excellent maneuverability.
- Steering Dampers: These help to absorb shocks and vibrations, providing a smoother and more comfortable ride.
- Wheel Alignment: Proper alignment ensures that the mower tracks straight and evenly, reducing tire wear and improving overall performance.
Steering Levers
Steering levers play a crucial role in controlling the mower’s direction and wheel speed. By adjusting the levers forward or backward, you can steer and maneuver your mower in various directions.
However, proper alignment of the steering levers is crucial for smooth operation and preventing uneven cuts.
For optimal performance and steering speed, steering levers should be adjusted to the same height, as unevenness can cause navigation problems.
Steering Dampers
Steering dampers are pivotal in mitigating shocks and vibrations, providing a smoother mowing experience and enhancing the precision of handling.
They are key to diminishing the toll on the mower deck and curtailing the transfer of vibrations to the operator’s hands and arms, ensuring comfort during operation.
Wheel Alignment
Misalignment can lead to a slack steering feel and a mower that’s difficult to maneuver.
To fine-tune the wheel alignment on your Husqvarna zero turn mower, adjustments should be made to the steering levers in concert with verifying the tire pressure, as directed by the manufacturer’s guidelines.
Ensuring tire pressure is balanced is crucial for maintaining this alignment, guaranteeing accurate handling and facilitating a stable, smooth mowing experience.
Regular Maintenance Tips for Optimal Steering Performance
Regular maintenance, including lubricating steering components, inspecting for wear and damage, and scheduling routine service, can keep your Husqvarna zero turn mower in top condition and prevent steering issues.
These simple steps can extend the lifespan of your mower and ensure optimal steering performance.
Lubricating Steering Components
Regular lubrication of steering components prevents wear and assures smooth operation. Use Husqvarna Grease, which is formulated to reduce friction, wear, and provide rust protection.
Proper lubrication not only prevents wear but also reduces stiffness in the steering arms, improving overall steering performance.
Related Post: What Kind Of Oil To Use In A Husqvarna Zero Turn Mower
Inspecting for Wear and Damage
Examine steering components for wear and damage, replacing or repairing them as required. Signs of wear and damage may include:
- Impaired maneuverability
- A stiff steering arm
- Insufficient lubrication
- Broken or damaged steering wires
Regular inspections can help maintain optimal performance and prevent further damage to your mower.
Scheduling Routine Service
It is recommended to arrange for regular services for your mower’s steering system once a year for optimal performance.
Routine maintenance and service ensure that your mower remains reliable and efficient, extending its lifespan and upholding the warranty.
Troubleshooting Steering Problems
When encountering steering problems with your Husqvarna zero turn mower, diagnosing persistent issues and recognizing when to call a professional is vital.
Regular maintenance and inspections can help prevent many common issues, but some problems may require expert advice and service.
Read More: How to Drive a Zero Turn Mower
Diagnosing Persistent Issues
When diagnosing persistent steering issues, check for common problems such as:
- Stiff steering arms
- Mower movement issues
- Faulty dampers
- Low power steering fluid levels
- Jammed or damaged steering levers or wires
Perform necessary adjustments or repairs to resolve the issue, but if the problem persists or worsens, it may be time to consult a professional.
Knowing When to Call a Professional
If steering problems persist or worsen, or if you are uncertain about the repair process, it is advisable to contact an authorized servicing dealer for assistance. Professionals can:
- Inspect and lubricate steering system components
- Check and repair steering dampers
- Evaluate tire pressure
- Rectify stiff steering arms
- Adjust the steering on Husqvarna zero turn mowers.
Summary
By following our comprehensive guide, you can ensure smooth operation, precise cuts, and efficient navigation.
Remember to regularly inspect, lubricate, and service your mower, and don’t hesitate to consult a professional if steering problems persist. Your Husqvarna zero turn mower will thank you!
Frequently Asked Questions
Why is my Husqvarna riding mower hard to steer?
It appears that the lack of lubrication or damage to the steering wires may be causing your Husqvarna riding mower to be hard to steer.
How do you level a deck on a Husqvarna zero turn?
To level a deck on a Husqvarna zero turn, measure the height of one side of the deck and then move to the other side to check that the measurement is the same. Refer to the maintenance instructions for the Husqvarna RZ-series Zero Turn Mowers for further guidance.
How do you adjust the lever on a zero turn mower?
To adjust the lever on a zero turn mower, loosen the nut on the adjustment bolt, turn it counterclockwise to increase lever travel and clockwise to reduce lever travel, then tighten the nut again.
How often should I lubricate the steering components of my Husqvarna zero turn mower?
It is recommended to lubricate the steering components of your Husqvarna zero turn mower regularly to prevent wear and ensure smooth operation.
What are some common steering issues encountered in Husqvarna zero turn mowers?
Common steering issues experienced with Husqvarna zero turn mowers include uneven steering levers, stiff steering arms, and imbalanced tire pressure.