
As a seasoned expert in lawn equipment maintenance with over a decade of hands-on experience, I understand the frustration and inconvenience caused by a non-starting mower.
This article is crafted to provide you with practical, straightforward solutions, drawing from a wealth of knowledge in mechanical repairs and lawn equipment functionality.
Trust in this guide to navigate you through effective troubleshooting steps, ensuring you can quickly and efficiently resolve why your Husqvarna zero turn won’t start. Let’s dive into the solutions that will get your mower running smoothly again.
Quick Summary
- A weak or dead battery is a common cause of starting problems in Husqvarna zero turn mowers. Use a voltmeter to check the battery’s charge and ensure it’s around 12.6 volts for optimal performance.
- Regular maintenance of the mower’s wiring, including checking for loose or corroded wires, is crucial for preventing starting issues.
- Fuses are typically located on the right-hand side of the frame and can be tested for continuity using a multimeter to ensure they are functioning properly.
- Use a multimeter to check their continuity, as malfunctioning safety and ignition switches can prevent the mower from starting.
Solution #1: Inspect and Charge the Battery
A weak or dead battery can prevent the engine from cranking and leave you stranded with an unfinished lawn. Regular battery checks, safe charging and timely replacement will help your mower start smoothly.
Checking the battery charge
A voltmeter is an invaluable tool for diagnosing battery issues in your lawn mower. To check your battery’s charge, follow these steps:
- Turn on the voltmeter.
- Set it to the DC voltage setting.
- Touch the probes to the negative and positive terminals of the battery.
- A fully charged battery should read around 12.6 volts.
- If the voltage is significantly lower, the battery may need charging.
It’s beneficial to be aware of the recommended battery charge for starting your mower. Typically, a battery should have a charge of around 70 to 80 percent to start the mower effectively.
Overcharging or draining the battery completely can decrease its lifespan and contribute to mower starting problems.
Charging the battery safely
Charging your mower’s battery requires careful attention to safety. Here are some steps to follow:
- Make sure to wear protective gear, such as gloves and safety glasses.
- When connecting the charger cables, ensure they have a rubber coating and are connected to the correct battery terminals.
- Adjust the charger’s voltage level according to your battery type, typically 12 volts for a lawn mower battery.
- Don’t exceed 10 amps at maximum.
Improper charging can lead to:
- Overcharging
- Fire risks
- Damage to the battery and charger
- Health concerns
When to replace the battery
There are several signs that your mower’s battery may be failing. These include:
- The engine not starting
- Clicking noises when attempting to start the mower
- A rotten egg smell
- Incorrect fluid levels
- Bulging or damage to the battery
- Excessive corrosion
- Low voltage readings
If you notice any of these signs, it’s time to invest in a new battery.
To purchase a new battery for your Husqvarna mower, check your local lawn mower dealership, hardware store, or automotive store. Bring your existing battery, as you may need to match the specifications of your old battery to the new one.
Solution #2: Examine Wiring and Connections
Vibration and moisture are common causes of loose wiring and corroded connections.
The subsequent sections will guide you on identifying and fixing loose or corroded wires, and maintaining optimal wiring performance for efficient mower operation.
Identifying loose or corroded wires
Loose or corroded wires can lead to various problems in your mower’s performance. Typical indications of wire corrosion include:
- Corroded or unclean electrical connections
- Rusting or punctures in the wires
- A dull or corroded appearance of the wires
- Battery corrosion on the positive terminal
- Carbon accumulation or rust on the spark plug
Areas in a mower that are most prone to wire corrosion and looseness include the electrical connections and terminals, such as the spark plug, solenoid or starter connections, and the input cord socket and wiring.
To address loose wiring and connection issues, secure any loose wires and connections, and remove any exposed connections or wires that may be causing issues. Using a baking soda solution on areas affected by corrosion can be beneficial.
Fixing connection problems
Repairing or replacing identified damaged wiring components is important for maintaining good electrical continuity. Consult the manufacturer’s manual or a professional mechanic for further assistance if needed.
To prevent future connection problems, regular inspection of your mower’s wiring is recommended. Here are some steps to follow:
- Be sure to maintain the battery and replace any damaged components as needed.
- Keep an eye out for any signs of fraying, tearing, or damage in the wiring harness.
- Consult a professional if you suspect any issues.
Related Posts:
- Husqvarna Z254 Problems: Troubleshooting
- Husqvarna Zero Turn Mower Problems
- Bad Boy Mowers Problems: Troubleshoot
Maintaining wiring for optimal performance
Proper maintenance of your mower’s wiring can help prevent future starting issues. Here are some steps you can take:
- Regularly inspect power and extension cords for signs of fraying or cracking, and repair or replace them as needed.
- Apply a thin coating of anti-corrosion lubricant to the inside of the fuse holder and the surface of the fuse connectors to avoid future fuse problems.
- Inspect the battery before storing it and keep it warm during the winter months.
By following these steps, you can ensure the proper maintenance of your mower’s wiring and prevent starting issues.
Maintaining your mower’s wiring and being alert for signs of corrosion or damage ensures smooth mower operation and helps avoid frustrating starting issues.
Solution #3: Check and Replace Fuses
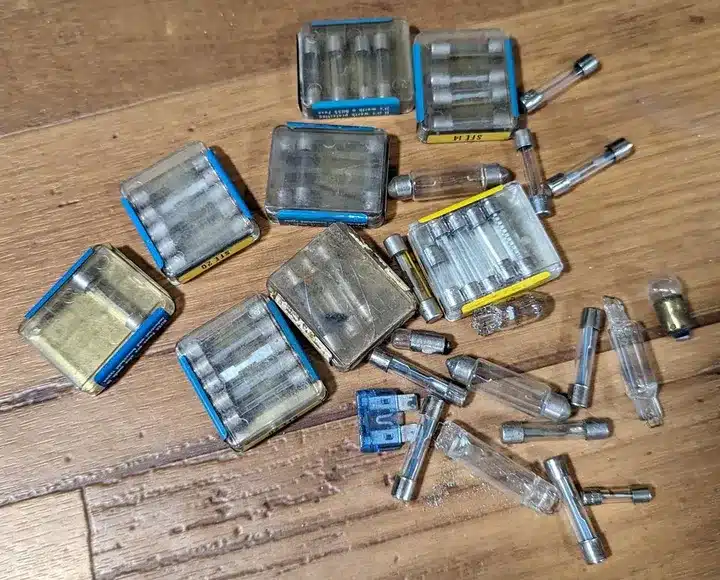
Fuses are vital to your mower’s electrical system, protecting it from damage. If your Husqvarna zero turn mower won’t start, checking and replacing fuses may be the solution. The subsequent sections will guide you on:
- How to locate the fuses
- How to inspect the fuses
- How to replace blown fuses
- How to prevent future fuse problems.
Locating and inspecting fuses
The fuses in a Husqvarna zero turn mower are usually located on the right-hand side of the frame near the rear of the machine and can be accessed by tilting the seat forward on the left-hand side.
To inspect fuses, use a multimeter to check for continuity. If the multimeter registers “OL” (open line) or no continuity, the fuse is likely defective and should be replaced.
If you suspect a blown fuse, visually inspect it for any signs of damage or wear. Some fuses feature a sight glass that allows you to identify if the fuse has been blown. Once you’ve identified a damaged fuse, it’s time to replace it.
Replacing blown fuses
To replace a damaged fuse, follow these steps:
- Turn off the power to the mower.
- Remove the old fuse.
- Insert a new fuse with the same power rating.
- Test the mower to confirm that the issue has been resolved.
Make sure to follow safety precautions during the replacement process to avoid potential injury or damage to your mower.
Preventing future fuse problems
Maintaining your mower’s electrical system can help prevent future fuse issues. Here are some tips:
- Regularly inspect all fuses and replace any that have blown.
- Apply a thin coating of anti-corrosion lubricant to the inside of the fuse holder and the surface of the fuse connectors to prevent corrosion.
- Inspect the battery before storing and keep it warm during the winter months to avoid fuse problems related to battery performance.
Proactive maintenance of your mower’s electrical system helps avoid future fuse problems and ensures your Husqvarna zero turn mower runs smoothly.
Solution #4: Test and Replace Safety and Ignition Switches
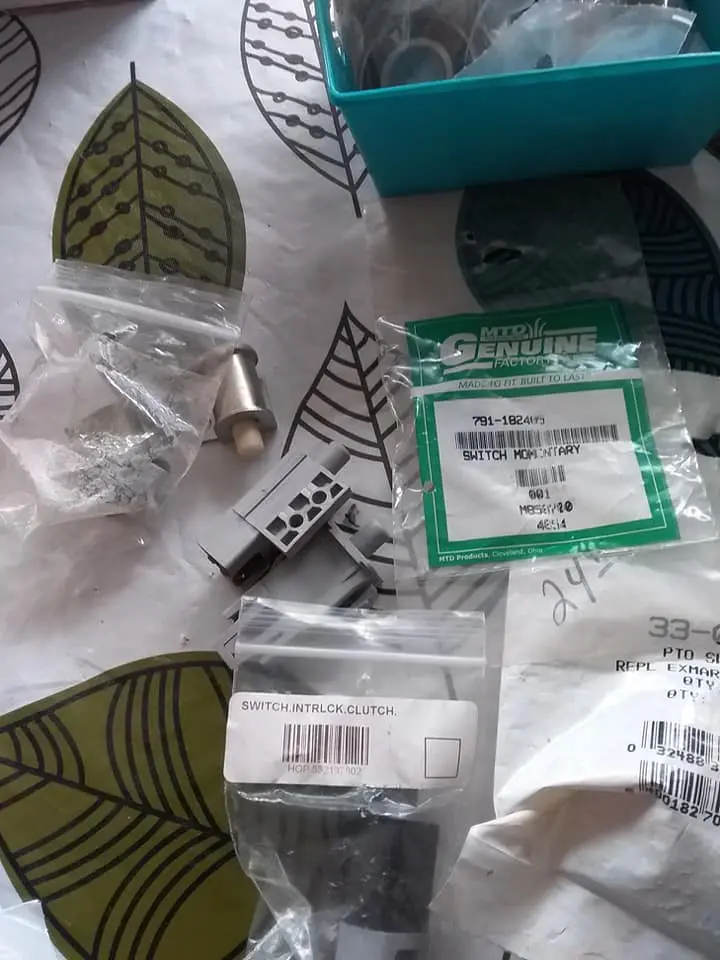
Safety and ignition switches are essential components of your mower’s operation. If your mower isn’t starting, it’s possible that one or more of these switches are malfunctioning.
Testing safety switches
Safety switches, serve to prevent the mower from starting under certain conditions, such as when the brake is engaged or an operator is no longer present. To test these switches, use a multimeter to check their continuity.
If the multimeter registers “OL” (open line) or no continuity, the switch is likely defective and should be replaced.
Testing the ignition switch
The ignition switch is responsible for starting your mower’s engine when you turn the key. To test the ignition switch, follow these steps:
- Use a multimeter to check the voltage at the switch.
- A functioning ignition switch should have a reading that is close to your battery voltage, typically around 12 volts.
- If there is no voltage or a significantly lower voltage, the switch may be defective.
Prompt attention to a suspected faulty ignition switch, which could be a bad ignition key switch or a bad switch, can prevent further complications with your mower’s operation, such as a clogged fuel filter.
By ensuring the proper functioning of the key switch, you can avoid these issues.
Replacing faulty switches
Identifying a malfunctioning safety or ignition switch signals the need for replacement. Refer to the manufacturer’s manual or seek professional assistance to make sure the correct replacement switch is installed.
Replacing faulty switches ensures smooth and reliable operation of your Husqvarna zero turn mower.
A bad safety switch should always be addressed promptly to keep your mower running safely and efficiently.
Solution #5: Assess and Repair Starter Components
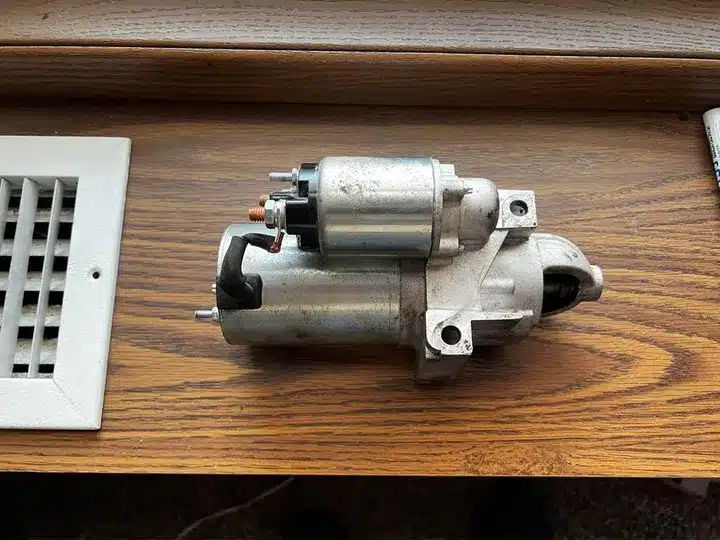
The starter solenoid and motor are essential components that ensure your Husqvarna zero turn mower starts reliably. If your mower is experiencing starting difficulties, diagnosing and fixing starter component issues may be the solution.
Diagnosing starter solenoid problems
Starter solenoid issues can cause various problems in your mower’s performance. Common issues with starter solenoids in lawn mowers include:
- A clicking or humming sound when the ignition key is turned
- Wiring becoming hot and emitting smoke
- The starter engaging but not activating the engine
- Corroded or loose solenoid or starter connections.
To diagnose a bad starter solenoid problem, use a multimeter to test the solenoid for continuity.
Troubleshooting starter motor issues
Starter motor issues can also cause a situation where your mower won’t start. Common problems with starter motors in lawn mowers include:
- The engine not cranking
- The starter motor spinning without cranking the engine
- Clicking noises when the ignition button is pressed
- The mower not starting at all
To troubleshoot a starter motor issue, you can either remove the starter motor and have it tested or consult a local repair shop that specializes in starter and alternator repairs.
Read More: Bad Boy Mower Starts Then Dies
Repairing or replacing starter components
If you’ve identified a damaged starter solenoid or motor, it’s important to repair or replace the affected component to keep your mower running smoothly and reliably. Consult the manufacturer’s manual or seek professional assistance to ensure the correct repair or replacement process is followed.
Summary
We’ve explored five solutions to common starting problems with Husqvarna zero turn mowers.
Those are inspecting and charging the battery, examining wiring and connections, checking and replacing fuses, testing and replacing safety and ignition switches, and assessing and repairing starter components.
Following these steps and promptly addressing any issues, you can keep your mower running smoothly and efficiently.
Regular maintenance and inspections are key to preventing starting issues and ensuring your Husqvarna mower remains a reliable tool in your lawn care arsenal.
Stay proactive and keep your mower in top condition, and you’ll be ready to tackle any lawn care challenge that comes your way.
Frequently Asked Questions
What causes a Husqvarna not to start?
Bad fuel in the carburetor can lead to clogging, preventing the engine from starting. Cleaning the carburetor with a carburetor cleaner should help resolve the issue.
What are the most common problems with zero-turn mowers?
Common problems with zero-turn mowers include engine issues, poor cutting performance, belt slippage, and clogged air filters. Ensuring your mower is properly maintained is the best way to prevent such issues.
Where is the fuse on a Husqvarna zero-turn lawn mower?
The fuses on a Husqvarna zero-turn lawn mower are located on the left side and accessed by tilting the seat forward. They are of the same type used in automobiles and come in two ratings: 20 Amp Primary fuse and 7.5 Amp mower deck coupling.
Why is my lawn mower not turning over?
It is likely that the lawn mower won’t start due to a weak battery, faulty wiring, bad starter solenoid, failed starter motor or a seized engine, or an issue such as low fuel, spark plug issues, a clogged carburetor, a broken clutch, or broken gears. Check for gas, clogged filters and collapsed lines, the float, the needle valve, spark plugs, air filter and fuel flow.
How often should I inspect my mower’s wiring for signs of wear or corrosion?
Inspecting your mower’s wiring at least once annually or after every 50 hours of use is recommended.