
Maintaining sharp and well-conditioned blades on your riding mower is crucial for both the health of your lawn and the longevity of your equipment.
As a professional with extensive experience in lawn maintenance, I understand the importance of timely blade care.
In this blog post, I will provide you with a practical guide on when and how to replace your riding mower blades effectively, ensuring you get the best performance out of your machinery without unnecessary expense.
Trust in my expertise as we delve into the essentials of blade maintenance, and I’ll ensure you’re equipped with the knowledge to make informed decisions for your lawn care needs.
Quick Summary
- To effectively change riding mower blades, the process involves assessing blade condition, ensuring safety measures, and using appropriate tools for blade removal and installation.
- Implementing proper lifting techniques, like using hydraulic jacks or mower lifts, is crucial for safe and effective blade replacement.
- Regularly maintained mower blades can reduce lawn mowing time by up to 20%, demonstrating the importance of routine blade care.
- From my experience, replacing or sharpening mower blades significantly enhances lawn appearance and mower performance, making it a worthwhile task for any lawn care enthusiast.
Step-by-step Mower Blade Replacement
Changing the blades on your riding mower is a vital aspect of lawn care maintenance that directly impacts the health of your lawn and the effectiveness of your equipment.
- Preparation for Blade Replacement
- Loosening and Removing Blade Fasteners
- Removing the Old Blade
- Installing the New Blade
- Deciding Between Sharpening or Replacing
This practical step-by-step approach, honed from my extensive experience in lawn maintenance, is designed to optimize your mower’s performance and enhance the beauty of your lawn without incurring unnecessary expenses.
Preparing Your Mower: Tilting It to One Side
- Drain the Fuel:
- Locate the fuel tank on your mower.
- Position a fuel-safe container beneath the tank’s outlet valve.
- Open the valve to allow the fuel to drain into the container. If your mower doesn’t have a valve, you may need to use a siphon pump.
- Ensure that all fuel is drained to prevent any spillage or fire hazards during maintenance.
- Store the drained fuel in a safe place, away from direct sunlight or heat sources.
- Disconnect the Spark Plug:
- Identify the spark plug wire which is usually attached to the front of the engine.
- Grasp the boot that covers the spark plug and gently pull it to disconnect the wire.
- This step is critical to ensure that the engine doesn’t start accidentally during the maintenance process.
- Optionally, you can also remove the spark plug entirely using a spark plug socket for added safety.
- Find a Level Surface:
- Choose a flat and stable surface for the maintenance work, such as a garage floor or a driveway.
- Avoid grassy or soft surfaces as they can cause instability when the mower is tilted.
- Ensure the surface is free of obstacles and debris to prevent any accidents.
- Secure the Mower:
- Before tilting the mower, ensure it is stable and will not roll or shift.
- Use wheel chocks or blocks to secure the wheels that will remain on the ground.
- Verify that all brakes are engaged (if available) to prevent the mower from moving.
- Tilt the Mower:
- Stand on the side of the mower opposite to the side you plan to lift.
- Gently and slowly tilt the mower towards you, ensuring you maintain a firm grip.
- Do not tilt the mower too far; just enough to access the underside is sufficient.
- Once tilted, use a sturdy prop or a specially designed mower lift to support the raised side of the mower.
- Double-check that the mower is securely supported before proceeding with any maintenance work.
Loosening and Removing Blade Fasteners
- Stabilize the Mower:
- Ensure the mower is securely tilted and stable on its side, with the blades accessible for maintenance.
- Select the Appropriate Tools:
- Identify the type of fasteners used on your mower’s blade. This could range from simple bolts to more complex fastener types.
- Choose the correct size wrench or socket that fits the fasteners. Having a range of tools at hand is beneficial if you encounter different types of fasteners.
- Ensure Safety from Sharp Edges:
- Wear sturdy gloves to protect your hands from the mower’s sharp blades.
- Be mindful of the blade edges as you work, positioning your hands and tools to avoid accidental cuts.
- Check for Corrosion:
- Inspect the blade fasteners for any signs of rust or corrosion.
- In cases of severe rust, apply a penetrating oil to help loosen the fasteners. Allow it to soak in for a few minutes before attempting to loosen the bolts.
- Loosen the Blade Fasteners:
- Firmly grip the wrench and apply steady pressure to the fasteners.
- If the bolts are particularly tight, use a back-and-forth motion to gradually loosen them without stripping the heads.
- Be consistent in your pressure to avoid sudden slips that could cause injury or damage.
- Remove the Blade Fasteners:
- Once loosened, unscrew the bolts or fasteners completely.
- Keep the fasteners in a safe place as you will need them to secure the new blade or when reattaching the same blade after sharpening.
- Keep Torque Specifications in Mind:
- Remember the importance of torque specifications for when you reattach the blade.
- Fasteners that are too loose can lead to the blade coming off during operation, while over-tightening can damage the fasteners or the mower’s spindle.
Taking Off the Worn-Out Mower Blade
- Secure the Blade to Prevent Rotation:
- Use a sturdy piece of wood to immobilize the blade. Place the wood against the blade’s body in a manner that it prevents the blade from moving while you unscrew the fasteners.
- This step is important for both your safety and to make the removal process easier.
- Carefully Unscrew the Fasteners:
- With the blade secured, use the appropriate tool (usually a wrench or socket) to carefully unscrew the fasteners.
- Take your time to avoid slipping, which could lead to injury or damage.
- Handle with Safety:
- Be meticulous in handling the blade, especially if it’s still sharp. Wear gloves to protect your hands from any sharp edges.
- Carefully remove the blade from its position once the fasteners are completely unscrewed.
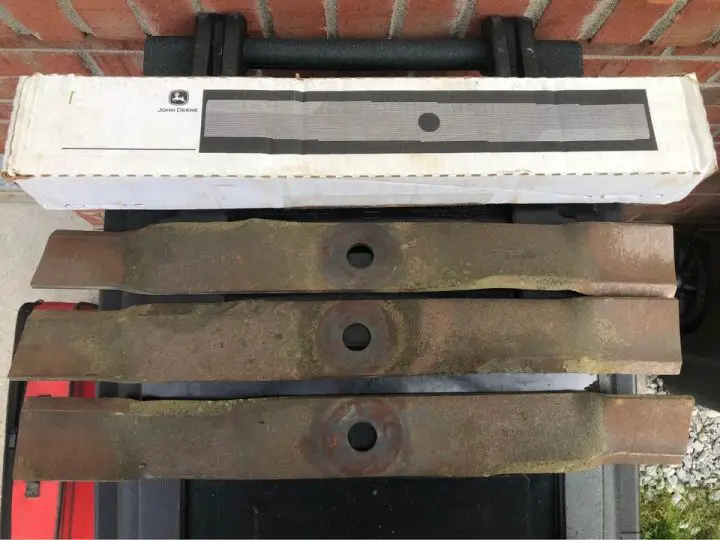
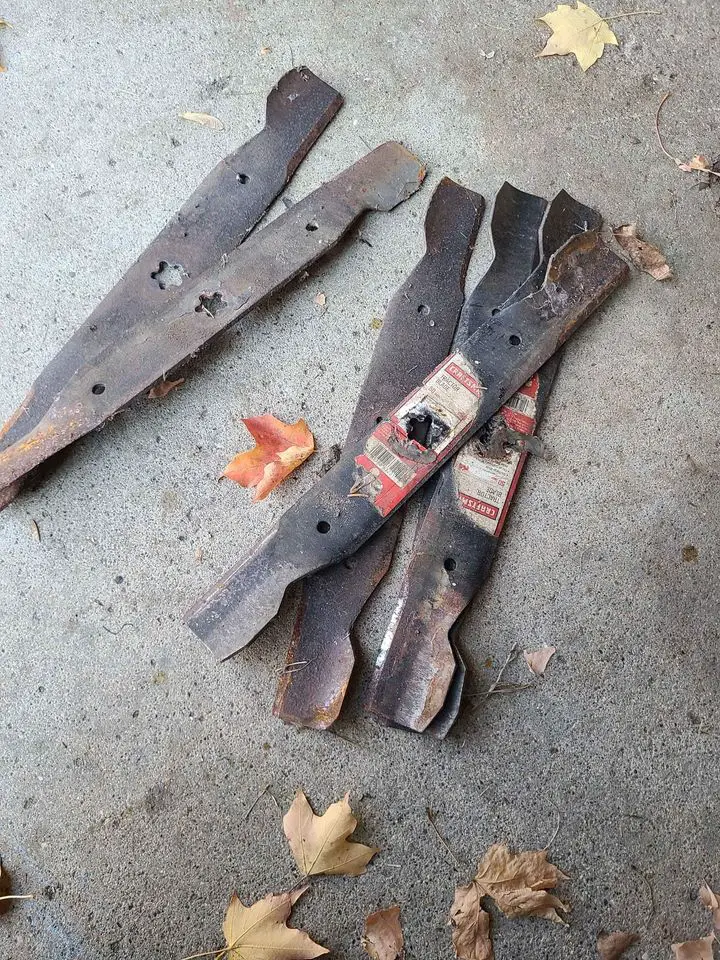
- Inspect the Old Blade:
- Check the old blade for signs of wear, such as nicks, bends, or dullness, which indicate that it’s time for a replacement.
- Look for any signs of corrosion or damage that might compromise the blade’s integrity.
- Eco-Friendly Disposal:
- Consider how you will dispose of the old blade. Look for eco-friendly disposal methods, such as recycling, if available in your area.
- Avoid simply throwing the old blade in the trash as it can be harmful to the environment and waste management workers.
- Compare Blade Balance:
- Compare the balance of the old blade with the new one. An unbalanced blade can cause your mower to vibrate and result in uneven cuts.
- You can test the balance by balancing the blade on a round object, like a nail or a blade balancer tool, to see if it tilts to one side.
- Ready for New Blade Installation:
- Once the old blade is safely removed and you’ve taken note of its condition and balance, you’re ready to proceed with installing the new blade.
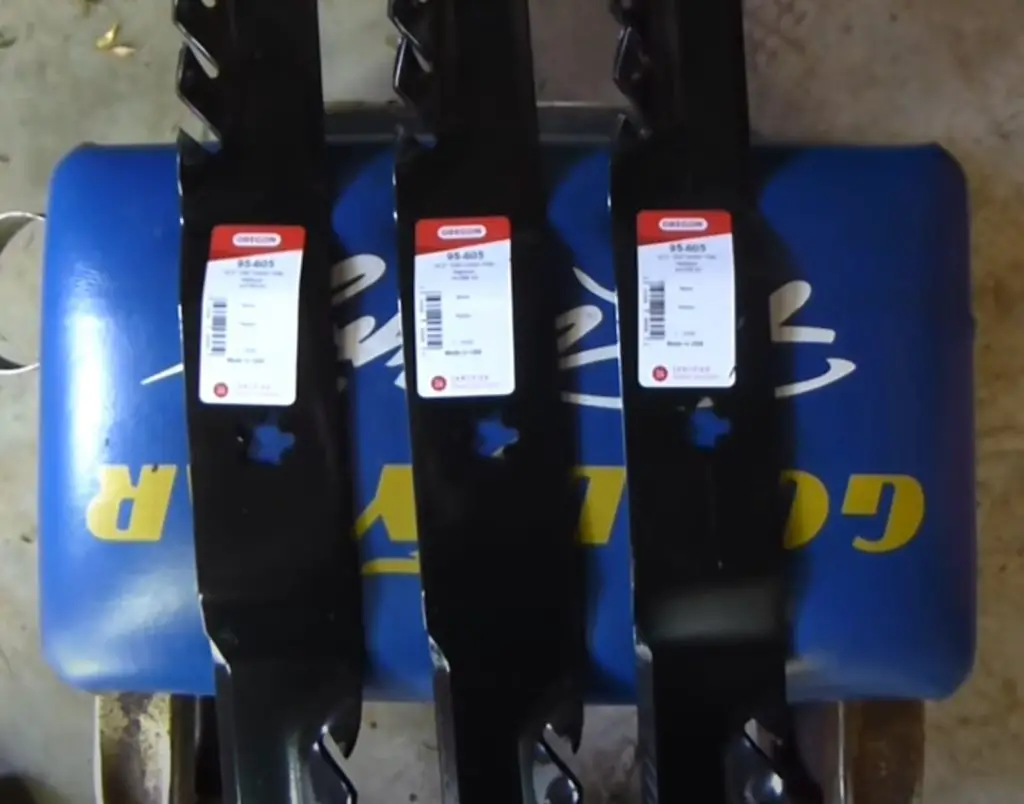
Putting on the Replacement Blade
- Prepare for Installation:
- Before beginning, make sure you have the new blade and all necessary tools at hand.
- Wear protective gloves to safeguard your hands from the sharp edges of the new blade.
- Blade Alignment:
- Position the new blade onto the mower’s spindle, aligning it with the mounting hole.
- Ensure that the blade is oriented correctly, with the cutting edges facing the correct direction (usually towards the ground).
- Secure the Blade:
- Once aligned, insert the fastening bolt through the center hole of the blade.
- Hand-tighten the bolt to secure the blade in place temporarily.
- Consult the Mower’s Manual for Torque Specifications:
- Refer to your mower’s manual to find the correct torque specifications for the blade fastening bolt.
- This information is crucial to ensure that the blade is neither too loose (which could lead to the blade coming off during operation) nor too tight (which could cause damage to the blade or mower).
- Tighten the Blade:
- Using a torque wrench, tighten the fastening bolt to the specified torque.
- Double-check to make sure it’s secure without over-tightening.
- Perform Blade Balancing:
- Check the balance of the newly installed blade. An unbalanced blade can cause vibrations, uneven cuts, and excessive wear on the mower.
- You can use a blade balancer tool or a simple DIY method, like balancing the blade on a round object, to check for even weight distribution.
- Final Checks:
- Once the blade is balanced and securely attached, conduct a final inspection to ensure everything is in place.
- Remove the gloves and any tools from the working area.
- Test Run:
- Carefully return the mower to its upright position.
- Perform a test run to check the installation, listening for any unusual noises or vibrations which might indicate an issue with the blade installation.
Deciding Between Sharpening or Purchasing a New Blade
Now, I’m faced with a choice: should I sharpen my current riding mower blade or is it time to buy a new one?
The decision isn’t always straightforward, as it hinges on the blade’s condition and how it’s been maintained.
Sharpening
I’ll consider factors such as cost, blade condition, and the time I’ve available.
Pros
- Cost-Effectiveness: Sharpening riding mower blades is a more economical choice compared to buying new ones. It offers immediate benefits without significant investment.
- Material Preservation: This approach helps preserve blade materials, ensuring consistent and reliable cutting patterns for your lawn.
- Safety and Maintenance: Following safety guidelines and maintaining a routine sharpening schedule can reduce the overall frequency of maintenance required.
- Eco-Friendly: Sharpening blades is practical and environmentally friendly, as it minimizes the need for frequent blade disposal, reducing waste.
Cons
- Potential for Uneven Edges: Sharpening can lead to uneven blade edges, impacting the quality of the lawn cut.
- Compromised Blade Integrity: Over-frequent sharpening can weaken the blades over time, shortening their lifespan.
- Safety Concerns: Using incorrect tools or methods for sharpening can increase the risk of accidents. Proper tool selection and careful handling are vital for safety.
- Increased Maintenance Workload: Regular sharpening requires additional time and effort, adding to your maintenance workload.
- Environmental Impact of Disposal: Frequent blade replacement and improper disposal methods can lead to environmental waste. Proper disposal of worn-out blades is essential for sustainability.
Buying New
I’ll need to assess the condition of my current blades and my budget before making a decision.
Pros
- Peak Cutting Performance: Purchasing new blades ensures optimal cutting performance and minimizes the risk of blade failure.
- Importance of Blade Balance: New blades maintain proper balance, which is crucial for the smooth operation of the mower.
- Reduced Safety Concerns: With new blades, there’s no need to worry about the safety issues related to tool selection for sharpening.
- Simplified Process: Buying new blades often proves to be more convenient, simplifying the maintenance process.
- Environmental Consideration: Mindful of the environmental impact, proper disposal methods for old blades are considered when buying new ones.
Cons
- Higher Initial Cost: Buying new mower blades is generally more expensive than sharpening existing ones.
- Safety Hazards in Installation: New blades require careful selection and installation, which can pose safety hazards if not done correctly.
- Environmental Impact of Disposal: Improper disposal of old blades when replacing them with new ones contributes to environmental waste.
- Increased Maintenance Frequency: Using new blades may lead to a higher frequency of replacements, potentially increasing long-term expenses and environmental concerns.
Related: Best Blades For Bad Boy Mower: 2025 Buying Guide
Different Lifting Techniques for Mower Maintenance
Various methods, such as hydraulic jacks, jungle jacks, MoJack Mower Lifts, or even simple wood blocks or ramps, can be used for this purpose. Each method has its advantages and drawbacks.
For instance, hydraulic jacks are easy to use but have a limited surface area, increasing the risk of slipping.
Jungle jacks offer a more secure lift with their wider wheels and lifting hooks, while MoJack Mower Lifts are designed specifically for tractors and mowers, providing a safer lifting experience.
If you don’t have access to these tools, using sturdy wood blocks or ramps can be an alternative, though it requires extra caution to prevent slippage and ensure stability.
Read More: How to Jack up a Zero Turn Mower: Step-by-Step Guide
Safety Precautions During Blade Maintenance
Safety is paramount when changing riding mower blades. Always ensure the mower is switched off and the spark plug is disconnected to prevent accidental starting.
It’s advisable to wear eye protection, as dirt and grass stuck under the mower can fall into your eyes during maintenance. Stabilize the mower securely when lifted, using blocks or bricks as a backup system to brace the mower in case of slippage.
Remember, being cautious and taking these extra safety steps can prevent potential accidents and injuries, ensuring a safe and successful blade change process.
The Science Behind Mower Blade Design
Mower blades are more than just pieces of metal; they are intricately designed for optimal lawn care. Engineers carefully select the lift, length, and cutting edge of the blades to ensure the best mower performance.
These blades are tested within narrow specifications to provide a smooth and even cut.
An understanding of this science can help you appreciate the importance of regular blade maintenance and the impact of using well-designed, balanced blades on the health and appearance of your lawn.
Our Verdict
In my journey of changing preferred riding mower blades, I’ve realized it’s less about the task and more about understanding your equipment and respecting the process.
I’ve shared my personal experiences and insights on different aspects, from choosing between sharpening or buying new blades to understanding the science behind blade design.
Remember, safety always comes first, whether it’s disconnecting the spark plug or wearing the right gear. The satisfaction of installing new blades and seeing the immediate improvement in my lawn’s appearance is unmatched.
Whether you’re a seasoned pro or a newbie to lawn care, I hope my guide empowers you to take this task head-on, ensuring your mower gives you the best cuts throughout the season.
Remember, a little effort goes a long way in maintaining the health and beauty of your lawn.
Frequently Asked Questions
How often should I inspect my riding mower blades for wear or damage?
I should inspect my mower blades for sharpness, wear patterns, and damage signs every month to maintain them properly. Adhering to a regular inspection schedule ensures optimal cutting performance and safety.
Can I replace riding mower blades with universal blades, or do they need to be specific to my mower model?
I can’t just use any blades; I need to ensure blade compatibility, installation precision, and material quality for my mower model. Proper balance is crucial to avoid performance impact.
What safety gear should I wear when changing the blades on my riding mower?
When I’m working with tools, I always wear gloves and goggles for protection. Before starting, I’ll disconnect the battery, set up my workbench, choose the right tools, and use a lift jack safely.
After replacing the blades, how do I dispose of the old mower blades responsibly?
After removing them, I’ll take my old blades to a recycling center, or maybe repurpose them for a DIY project. If they’re hazardous, I’ll drop them off at my local scrapyard.
Can weather conditions affect the lifespan of my riding mower blades, and if so, how do I protect them?
Yes, weather can cause blade corrosion. I protect them with proper storage tips, regular cleaning habits, understanding lubrication importance, and using protective covers to keep my mower blades in top condition.