
With years of hands-on experience and a deep understanding of Husqvarna zero turn mowers, I offer you a concise and authoritative guide on how to adjust mower deck on husqvarna zero turn mower.
This article cuts straight to the chase, providing you with the essential steps and tips to ensure your mower performs at its best.
Key Takeaways
- Step-by-step guide on how to adjust the mower deck on a Husqvarna zero turn mower, ensuring users can achieve an even grass cut and optimal mower performance.
- It emphasizes the importance of gathering all necessary tools before starting the adjustment process, including adjustable wrenches, measuring tape, tire pressure gauge, and air compressor/pump.
- The article outlines the preparatory steps such as selecting a flat surface, engaging parking mode, disengaging blades, and adjusting tire pressure, followed by instructions for leveling the deck side-to-side and front-to-back.
- It offers troubleshooting tips for common issues like uneven cutting and difficulty adjusting nuts, while also highlighting the importance of safety measures, including wearing protective gear and ensuring the mower is off and cool before starting adjustments.
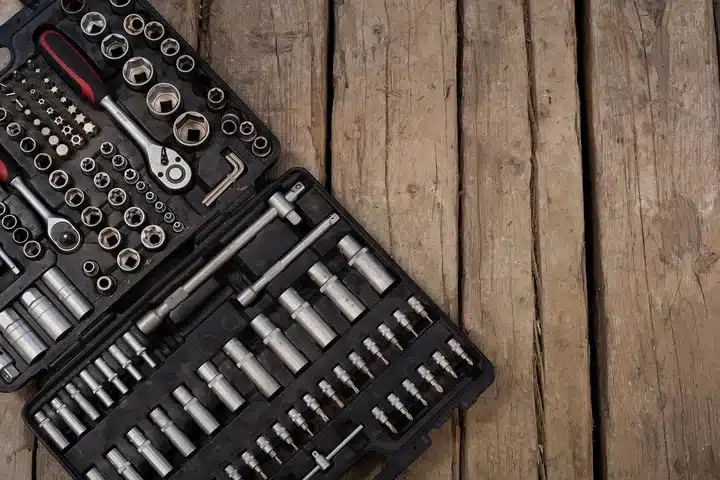
Gathering the Necessary Tools
Having the right tools at hand will make the job quicker, easier, and more precise.
Adjustable Wrenches
Adjustable wrenches are pivotal in the process of adjusting the mower deck on your Husqvarna zero turn mower.
They allow you to effortlessly loosen and tighten the nuts and bolts that secure the deck in place, ensuring a level and properly aligned deck for an even and uniform cut.
Measuring Tape
Measuring tape enables you to accurately measure the distance from the cutting edge of the deck to the ground, ensuring the correct deck height.
Additionally, it helps you measure the distance between different points of the blades, which is vital for leveling the deck and achieving an even cut.
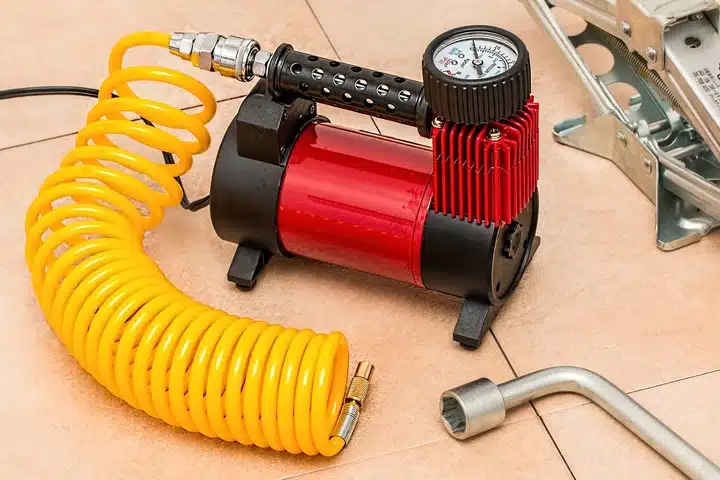
Tire Pressure Gauge
The recommended tire pressure for the front and rear tires may differ depending on the model of the mower, so using a tire pressure gauge ensures you have the appropriate pressure before adjusting the mower deck.
Regularly checking your mower’s tire pressure is crucial to ensure optimal performance and even cutting.
Air Compressor or Pump
An air compressor or pump is another essential tool for adjusting your mower deck, as it helps you:
- Inflate your tires to the correct pressure
- Clean the deck
- Maintain the mower deck
- Enhance cutting performance
- Provide convenience
Utilizing an air compressor or pump has multiple advantages.
Preparing Your Mower
Before commencing the deck adjustment process, appropriate preparation of your Husqvarna zero turn mower is required. This ensures not only a smooth operation but also your safety during the process.
Flat Surface Selection
A flat surface is paramount for accurate measurements and adjustments while adjusting your mower deck.
A level and even surface guarantees that the mower is stable and properly positioned, allowing you to make precise alterations to the cutting deck height and weight distribution.
Failing to use a flat surface can lead to an uneven cutting height, resulting in an inconsistent lawn appearance and potential damage to the mower blades.
Always ensure that your mower is positioned on a flat surface prior to making any adjustments.
Parking Mode and Blade Disengagement
While adjusting your mower deck, safety is of utmost importance.
Ensure your mower is safely secured and the blades are stationary during adjustments by engaging the parking mode and disengaging the blades on your Husqvarna zero turn mower.
Placing your riding mower in parking mode involves the following steps:
- Come to a complete stop.
- Turn off the blades.
- Depress the brake pedal.
- Move the shift lever into the park or neutral position.
Disengaging the blades ensures that they won’t unexpectedly engage during the adjustment process, reducing the risk of injury.
Read More:
- How To Change Blades On Husqvarna Zero Turn Mower
- Changing Blades on Bad Boy Mower
- Best Blades For Bad Boy Mower: 2025 Buying Guide
Attachment Lift Lever and Spark Plug
Beyond parking and blade disengagement, lifting the attachment lever and disconnecting the spark plug on your Husqvarna zero turn mower, also known as a Husqvarna mower, is also necessary.
Lifting the attachment lever allows for easier deck adjustment, while disconnecting the spark plug prevents the engine from inadvertently starting while you’re servicing the mower.
Adjusting Tire Pressure
Once your mower is set up correctly, the next step is to adjust the tire pressure. Ensuring your mower has the correct tire pressure is essential for obtaining a level cutting deck, which in turn leads to an even and consistent cut.
Use a tire pressure gauge to check the pressure of your mower’s tires and adjust them accordingly, using a bicycle pump or air compressor if necessary.
The optimal tire pressure for a riding mower with a level cutting deck is typically around 10 PSI for the rear tires and 14 PSI for the front tires.
Measuring Blade Distance from the Ground
The subsequent step involves measuring the blade distance from the ground with a measuring tape. This action is fundamental for confirming the correct cutting height and uniform cut across your lawn.
To measure the blade distance:
- Turn one of the two blades 90 degrees.
- Measure the distance from its front bottom tip to the ground surface.
- Measure the distance from the blade’s back bottom tip to the ground surface.
Record the measurements and ensure that the distance between the front and back blades is within the recommended range for your Husqvarna zero turn mower, which is typically ⅛” to ½” lower at the front.
If the measurements are outside this range, adjust the deck height accordingly.
Leveling the Deck Side-to-Side
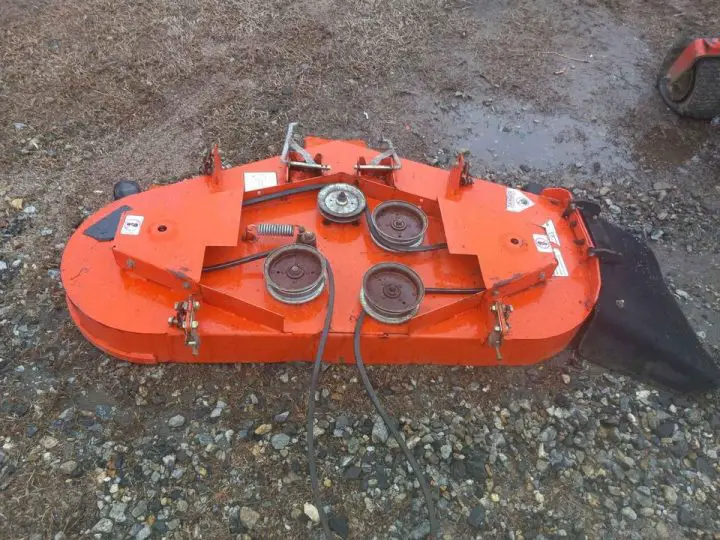
Next task is to level the deck from side to side. This process involves adjusting the lift-link adjustment nuts on either side of the mower in order to level the deck.
Using an adjustable wrench, turn the lift-link adjustment nuts counterclockwise to lower the deck or clockwise to raise it. Ensure that both sides of the deck are level and equal for an even cut across the entire width of the deck.
Leveling the Deck Front-to-Back
Measure the distance between the front and back blades as described before, and adjust the front suspension linkage nut accordingly to level the deck.
Turning the nut clockwise will raise the front of the mower, while turning it counterclockwise will lower the front. Ensure that the distance between the front and back blades is within the recommended range of ⅛” to ½” lower at the front.
Fine-Tuning the Riding Mower’s Deck Height
With the deck leveled correctly, proceed to adjust mower deck height utilizing the jam nut and inner adjustment nut. Loosen the jam nut and turn the inner adjustment nut clockwise to raise the front of the mower deck or counterclockwise to lower it.
Tighten the jam nut to secure the deck adjustment and ensure it remains constant and stable during operation. Remeasure the height of the deck from the blade to the ground after making the adjustment to guarantee it is at the desired height.
Securing the Deck Adjustment
Having fine-tuned the deck height, the next step is to solidify the deck adjustment by tightening the jam nut and reattaching any components that were detached.
Tightening the jam nut ensures that the adjustment nut remains in place and doesn’t shift during use, resulting in a stable and correctly adjusted mower deck.
Tighten the jam nut against the inner adjustment nut using two adjustable wrenches to ensure proper torque. This will guarantee that your mower deck remains level and properly adjusted for optimal cutting performance.
Troubleshooting Common Issues
Like any mechanical undertaking, you might come across some hitches during the deck adjustment process. Spotting and rectifying these issues is important for a successful adjustment and peak mower performance.
Also Read: Husqvarna Zero Turn Mower Problems
Uneven Cutting
A variety of elements such as:
- Low tire pressure
- Bent or improperly installed blades
- An unlevel deck
- A damaged mower deck
can lead to uneven cutting. If you notice any of these issues, it’s essential to address them promptly to ensure an even cut and prevent further damage to your lawn or mower.
By following the steps outlined in this guide, you can effectively troubleshoot and resolve uneven cutting issues, ensuring a smooth and even cut across your lawn.
Difficulty Adjusting Nuts
During the deck adjustment process, one common issue is tight or stuck nuts. Aggressively loosening tight nuts can result in damage to the nut or bolt, harm to the surrounding components, or personal injury.
To avoid these risks, it’s critical to use the appropriate tools and techniques for adjusting nuts.
Tire Pressure Maintenance
For optimal mower performance, it’s vital to maintain the correct tire pressure. Regularly inspect your mower’s tire pressure and inflate the tires to the recommended pressure using a tire pressure gauge and air compressor or pump.
By keeping your tire pressure in check, you’ll ensure a level cutting deck, even cut, and prolonged mower lifespan.
Prioritizing Safety in Mower Deck Adjustments
Safety is paramount when adjusting the deck of your Husqvarna zero turn mower. To ensure a secure and injury-free experience, adhere to the following safety precautions:
- Wear Protective Gear: Equip yourself with sturdy gloves to protect your hands from sharp edges and potential pinches. Safety glasses are crucial to shield your eyes from debris or any accidental sparks.
- Work on a Flat, Stable Surface: Choose a level area to prevent the mower from moving unexpectedly. This stability is essential for accurate adjustments and personal safety.
- Ensure Mower is Off and Cool: Before starting any adjustments, confirm that the mower’s engine is turned off and cool to the touch. This precaution prevents accidental starts and burns.
- Disconnect the Spark Plug: Always disconnect the spark plug before beginning. This crucial step prevents the mower from accidentally starting while you’re working, eliminating the risk of injury.
- Check Surroundings: Clear the area of tools, wires, and other potential trip hazards. Also, ensure children and pets are at a safe distance.
- Read the Manual: Familiarize yourself with your mower’s specific model through the manual. Each model may have unique features and safety protocols.
Summary
By following this comprehensive step-by-step guide, you can successfully adjust your Husqvarna zero turn mower’s deck and achieve the perfect lawn.
With the right tools, proper preparation, and accurate measurements, you’ll be well on your way to enjoying a beautifully manicured lawn and an optimally performing mower.
Frequently Asked Questions
How do you adjust the deck on a zero turn mower?
To adjust the deck on a zero turn mower, first loosen the lower nut on both sides of the deck. Then, starting with the front left, turn the top nut clockwise to raise the front, or counterclockwise to lower the front until the gauge just slips under. Finally, return the deck leveling gauge to its stored position in the compartment and reconnect your Z-track spark plugs.
How do you adjust the arms on a Husqvarna zero turn?
To adjust the arms on a Husqvarna zero turn, start by putting the mower in neutral and pushing down on the outside handle of the left-hand arm. Loosen the two nuts located on the back of the arm and adjust the height according to your preference before re-tightening the nuts.
Should a mower deck be level front to back?
For optimal mowing results, a lawn mower deck should be level front to back, with a pitch of 1/8-inch to 1/2-inch between the front and back. Generally, the best pitch is 1/4-inch depending on the type of mower being used.
How to remove mower deck on a Husqvarna?
To remove the mower deck on a Husqvarna, put the height adjustment lever in service position, lower the cutting deck, engage the parking brake, use the starter key with the attached tool to remove the cover, disconnect the cutting deck rod, release the belt tensioner and disconnect the drive belt.
How often should I adjust my mower deck?
Adjust your mower deck prior to each mowing session or at least once a year for optimal results.