Sharpening push mower blades is a critical skill for any lawn care enthusiast. As someone with extensive experience in landscaping, I’ve witnessed firsthand the detrimental effects of dull blades on grass health.
My expertise will guide you through a foolproof sharpening routine that ensures a crisp, even cut. This will elevate the health and appearance of your lawn. Trust in my methods for a straightforward and effective approach to blade maintenance.
Quick Summary
- Sharpening push mower blades involves inspecting them for wear and tear, choosing between manual sharpening with a file or whetstone and using a bench grinder, ensuring blade balance, and reattaching the blades to the mower.
- Regular maintenance, including cleaning, inspecting for wear and tear, and ensuring blade balance, is crucial for efficient mowing.
- Sharpened blades can reduce mowing time by up to 20%, emphasizing the importance of regular blade maintenance.
- Personally, I find that the effort put into sharpening mower blades pays off with a healthier lawn and a more enjoyable mowing experience.
Step by Step To Sharpen Push Mower Blades
- Inspect the Blades for Wear and Tear:
- Carefully examine the blades for any signs of damage such as nicks, dullness, or warping.
- Look for corrosion signs suggesting exposure to moisture or chemicals.
- Pay attention to wear patterns indicating uneven sharpening in the past.
- Choose an Effective Sharpening Technique:
- Decide between a manual approach (using a file or whetstone) and using a bench grinder.
- Choose based on your skill level and the condition of the mower’s blades.
- Manual Sharpening with File or Whetstone:
- Ensure to match the original blade angles to avoid metal fatigue.
- Regularly sharpen the blades to maintain their edge.
- Hone the blades consistently to achieve a consistent edge without overworking the metal.
- Using a Bench Grinder for Sharpening:
- Select the appropriate grinding wheel for your blade.
- Maintain consistent grinding angles for a sharp finish.
- Implement cooling methods to prevent overheating of the blades during sharpening.
- Ensure Blade Balance for Optimal Performance:
- After sharpening, check the balance of the blades using a balancer or by hanging them on a nail.
- If unbalanced, carefully remove more material from the heavier side to even out.
- Repeat the balance check until the blade hangs horizontally, indicating proper balance.
Comprehensive Guide to Sharpening Your Lawn Mower Blades
I’m here to walk you through the essential steps to get your push mower blades sharp and efficient.
We’ll start by gathering the right tools and making sure the mower is safely powered down and disconnected.
Related Articles:
Assembling Necessary Sharpening Tools
Before you begin the sharpening process, gathering all the necessary tools is crucial to ensure a smooth and efficient workflow.
I’ve got my file and whetstone for the actual sharpening, and I always remember a little oil for corrosion prevention – it’s key to keeping the tools and blade in top shape.
Understanding sharpening frequency helps me maintain the blade’s edge without overdoing it. I’m mindful of my blade angle, aiming for consistency with each stroke.
Safety First: Powering Down and Disconnecting the Mower
Always ensure that the push mower is completely powered down and disconnected from any power sources before attempting to sharpen its blades.
Adhering to safety protocols isn’t just smart; it’s crucial for injury prevention. It’s part of the maintenance schedule that shouldn’t be overlooked.
Here’s what I always do:
- Tool Disconnection: I make sure to remove the spark plug or battery to prevent any accidental starts.
- Power Source Isolation: I double-check that there’s no connection to electricity or any stored energy that could cause movement.
- Physical Inspection: Before proceeding, I inspect to verify that all parts have stopped moving and the mower is stable.
This routine ensures a safe environment for sharpening the blades and keeps me out of harm’s way.
Pre-Sharpening Cleanup of the Mower
I use appropriate cleaning methods, like a stiff brush or putty knife, to scrape away the gunk without causing blade damage.
It’s crucial to check for rust, as it can affect the sharpening outcome. I apply a rust remover and scrub until the metal is clean, ensuring I’m not compromising the blade’s integrity.
I’m mindful of disposal precautions, placing the waste into a bin rather than leaving it on the lawn, considering environmental considerations. It’s not just about getting the job done; it’s about respecting the surroundings and preventing pollution.
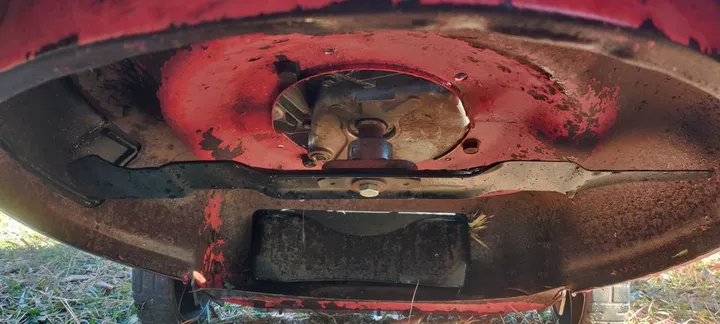
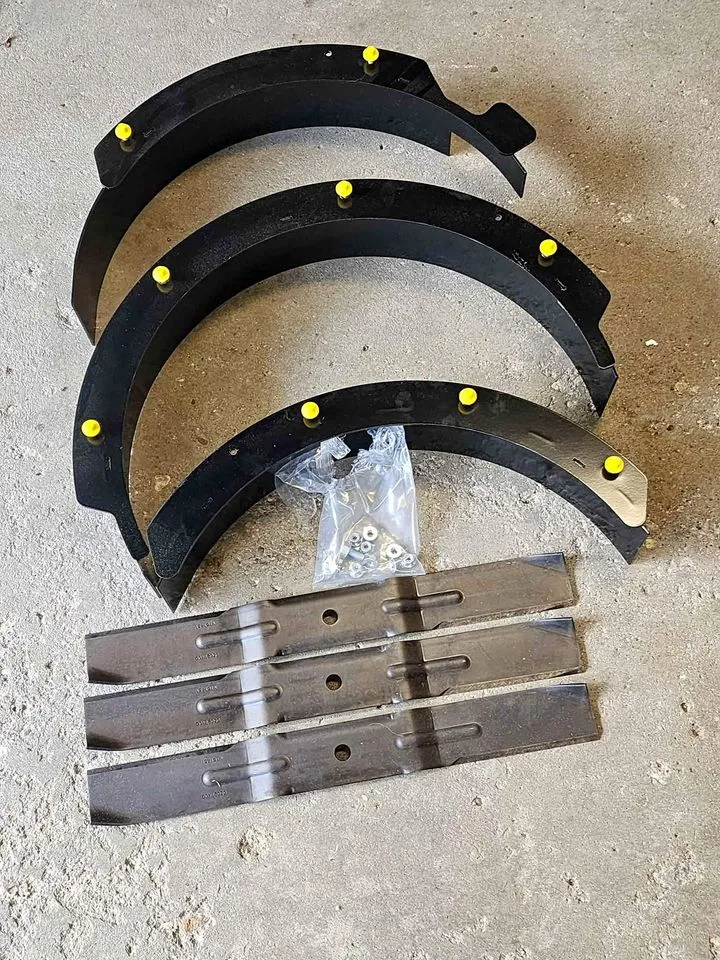
Detaching the Blades from the Mower
After cleaning, I proceed to detach the blades, ensuring the mower is stable and can’t move during this crucial step. I’m mindful of blade corrosion and wear gloves to avoid injury and prevent further damage to the metal. Here’s how I safely remove the blades:
- Safety First: I disconnect the spark plug wire to eliminate any chance of the mower starting accidentally.
- Locking Mechanisms: I engage any locking mechanisms or use a block of wood to prevent the blade from spinning while I loosen the bolts.
- Storage Tips: Once removed, I store the blades in a dry place to avoid any environmental considerations that could lead to rust while I prepare for sharpening.
This simple process works for most mower types and keeps my equipment in top condition.
Inspecting the Blades for Wear and Tear
I’m looking for any corrosion signs that suggest exposure to moisture or chemicals. I also inspect the wear patterns; uneven sharpening in the past can lead to one side wearing down quicker than the other.
Impact damage, like nicks from hitting rocks, can shorten the blade lifespan significantly.
It’s crucial to address these issues promptly. By ensuring the blades are in good condition before sharpening, I maintain the efficiency and longevity of my push mower.
Read More: Best Blades for Bad Boy Mower: 2024 Buying Guide
Choosing an Effective Sharpening Technique
When it comes to keeping my push mower in top shape, selecting the right sharpening technique is crucial.
I’ve found that a file or whetstone offers a manual, hands-on approach, while a bench grinder can make the job quicker and more consistent.
It’s essential I choose the method that best fits my skill level and the condition of my mower’s blades.
Manual Sharpening: Using a File or Whetstone
To manually sharpen your push mower blades, you’ll need a file or whetstone to effectively hone the cutting edge. Here’s how I maintain the blades:
- Blade Angles: I ensure to match the original angles to prevent metal fatigue.
- Sharpening Frequency: I sharpen regularly to minimize rust prevention efforts.
- Honing Skills: I’ve developed my honing skills to maintain a consistent edge without overworking the metal.
Using a Bench Grinder for Sharpening
While manual sharpening with a file or whetstone offers a controlled edge, utilizing a bench grinder can expedite the sharpening process for push mower blades.
I carefully select the right wheel and maintain consistent grinding angles for a sharp finish.
I always use cooling methods to prevent overheating and follow grinder maintenance tips.
Of course, personal protection is a must to ensure my safety.
Ensuring Blade Balance for Optimal Performance
Here’s how I make sure my blades stay balanced:
- Check Balance After Sharpening: Since different grass types and mowing frequency can wear blades unevenly, I always test balance after sharpening. I use a blade balancer or hang the blade on a nail to see if it tilts.
- Adjust Sharpening Angles: If one side is heavier, I’ll carefully remove a bit more material to even things out, paying attention to maintain the correct sharpening angles.
- Repeat as Necessary: I keep adjusting until the blade stays horizontal, ensuring optimal performance and a beautifully manicured lawn.
Reattaching the Blades to the Mower
Correct blade alignment is crucial as it impacts not only the quality of the cut but also the mower’s balance and vibration. Each blade should fit snugly and be secured according to the manufacturer’s torque specifications.
Over-tightening the blades can cause warping, while under-tightening could lead to them becoming loose during operation, posing a risk of accidents or damage.
To prevent the bolts from loosening due to mower vibrations, a common issue, I apply a thread locking compound. This extra step enhances safety and ensures the blades remain securely in place.
Additionally, marking the blade before removal is advisable to ensure it is reinstalled in the correct orientation, as reinstalling blades incorrectly, especially upside down, is a common mistake. It results in inefficient cutting and can be frustrating to diagnose.
Ensuring the blades are reinstalled correctly and securely minimizes mishaps and guarantees the mower functions as intended.
Also Read: How to Change Blades on Husqvarna Zero Turn Easily
Testing the Sharpness of the Blades Through Mowing
The freshly honed edges should make a noticeable difference in both the effort required to push the mower and the quality of cut. As I start mowing, I’m looking out for several key indicators:
- Grass Quality: The blades should slice through the grass cleanly, leaving behind a smooth, even surface. Ragged edges are a no-go.
- Cut Consistency: Each pass should be uniform, with no stragglers or uneven cuts. Consistency is the hallmark of sharp blades.
- Discharge Efficiency: The clippings should be distributed evenly, not clumping up or clogging the discharge chute.
I can tell that there’s less mowing resistance now; the mower glides more easily, which means my sharpening job was successful. The grass stands tall and then falls neatly in the mower’s wake, a testament to the cut consistency.
And when I look back, the clippings spread out evenly across the lawn, indicating optimal discharge efficiency.
It’s satisfying to see the immediate improvement in the lawn’s appearance—a direct result of my handiwork on the blades.
Understanding the Blade “Sail”
The “sail” of a mower blade, often overlooked in sharpening guides, is the higher side of the blade that is essential for creating airflow. This airflow helps to lift the grass upright, enabling a precise cut.
When the sail wears down, which can happen over time due to dirt and debris, it fails to create sufficient lift, resulting in a subpar cut. It’s important to regularly inspect the sail for wear and thinning.
When sharpening the blade, make sure the sail maintains its shape and integrity to ensure optimal mower performance.
Impact of Corrosion and Lawn Chemicals
Lawn chemicals, moisture, and other environmental factors can cause corrosion, significantly affecting your mower blades’ performance.
This corrosion not only dulls the blades but can also lead to them fusing with the mower’s deck, making removal for sharpening or replacement challenging.
To prevent such issues, it’s recommended to regularly clean the blades and apply a rust preventative. Furthermore, frequently removing and installing the blades can reduce the likelihood of corrosion, ensuring the longevity of your mower blades and deck.
Simple Blade Balancing Using a Nail
While professional blade balancers are available, using a nail is a straightforward and effective method to check blade balance. After sharpening, balance the blade on a nail. If the blade tilts or dips on one side, it indicates imbalance.
You should then file off a bit more from the heavier side until the blade hangs horizontally. This simple technique can prevent mower vibrations and potential damage to the blade shaft or bearings.
Diverse Sharpening Techniques and Their Applications
There are several methods to sharpen lawn mower blades, each with its own set of advantages. A manual file is a controlled and gentle method, ideal for beginners or those with a single mower.
For a quicker process, a drill-powered blade sharpener is effective, especially for those who are comfortable using power tools.
The bench grinder is the fastest method, used by professionals, but requires caution to avoid overheating and over-sharpening the blade. Understanding the pros and cons of each method allows you to choose the most suitable one for your needs and skill level.
Our Verdict
After all the sharpening and meticulous care I’ve put into my favorite push mower blades, the difference is night and day. There’s a unique satisfaction in seeing the evenly trimmed grass, knowing my efforts have truly paid off.
Regular sharpening isn’t just a chore; it’s become a part of my lawn care ritual that I genuinely enjoy. The ease of mowing with sharp blades is a game-changer, and the health of my lawn has noticeably improved.
From the crisp cuts to the reduced mowing time, the benefits are clear. Trust me, taking the time to sharpen your mower blades is worth every minute. Your lawn will show its gratitude with every perfect cut.
Frequently Asked Questions
Can I sharpen my push mower blades without removing them from the mower?
Yes, I can sharpen the blades without taking them off, ensuring blade stability and proper mower positioning. I’ll follow safety precautions, maintain the sharpening angle, and remove any debris during the process.
How often should I sharpen my push mower blades to maintain optimal cutting performance?
I should sharpen my mower blades regularly to enhance cutting efficiency and grass health. Blade lifespan and seasonal considerations suggest doing this at least once per mowing season for optimal performance.
Is it safe to use a power tool to sharpen push mower blades, or should I stick to manual methods?
I’m considering using power tools for sharpening, but I’ll need to follow safety precautions and maintain the blade angle. Otherwise, I might stick to manual sharpeners for their precision and control.
Are there signs that indicate my push mower blades are too worn to sharpen and need replacing?
I look for wear indicators and blade thickness to judge sharpening limits. If I see signs of metal fatigue, I’ll replace the blades, which typically happens after frequent use and regular sharpening.
How do I dispose of or recycle old push mower blades after I’ve replaced them with new ones?
I’m recycling my old mower blades by taking them to a local scrapyard. They’ll handle the metal upcycling, ensuring they don’t end up as hazardous waste, thanks to community programs.