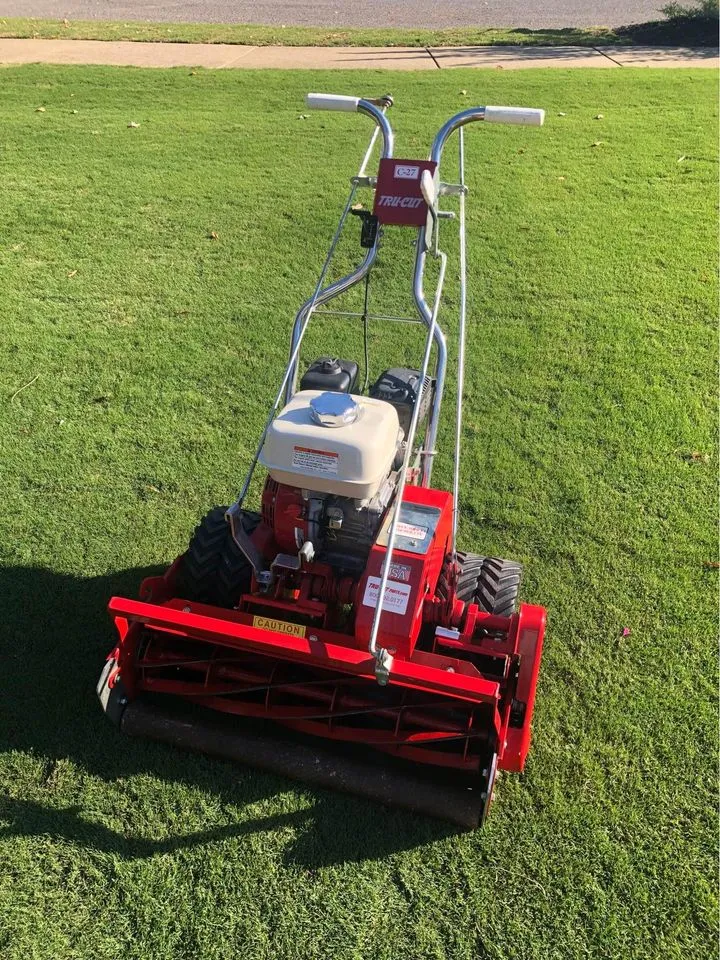
As a seasoned gardener with extensive experience in lawn maintenance, I understand the critical role a sharp reel mower plays in achieving a healthy and aesthetically pleasing lawn.
The quality of your grass’s cut and overall health hinges on the condition of your mower blades.
When these blades become dull, it not only hampers your mowing efficiency but can also damage your lawn. In this guide, I will provide you with a concise, expert-led walkthrough on how to sharpen reel mower blades effectively.
My aim is to equip you with the knowledge and confidence needed to maintain your mower’s performance, ensuring your lawn remains a vibrant, inviting space. Trust in my expertise, and let’s enhance the vitality of your greenspace together.
Quick Summary
- Sharpening reel mower blades effectively involves removing wheels for gear access, adjusting blade height, and using grinding compounds and tools like files or whetstones.
- Regular maintenance, including cleaning, lubricating, and aligning wheels and gears, is crucial for optimal blade sharpening and mower performance.
- According to the Outdoor Power Equipment Institute, a well-maintained lawn mower with sharp blades can improve grass cutting efficiency by up to 20%.
- In my experience, investing time in sharpening reel mower blades pays off with a healthier, more visually appealing lawn.
Step-by-Step: Best way to Sharpen Reel Mower Blades
- Getting Started with Sharpening Your Reel Mower: Begin by gathering all necessary tools for the sharpening process, including wrenches, pliers, and safety gear like gloves.
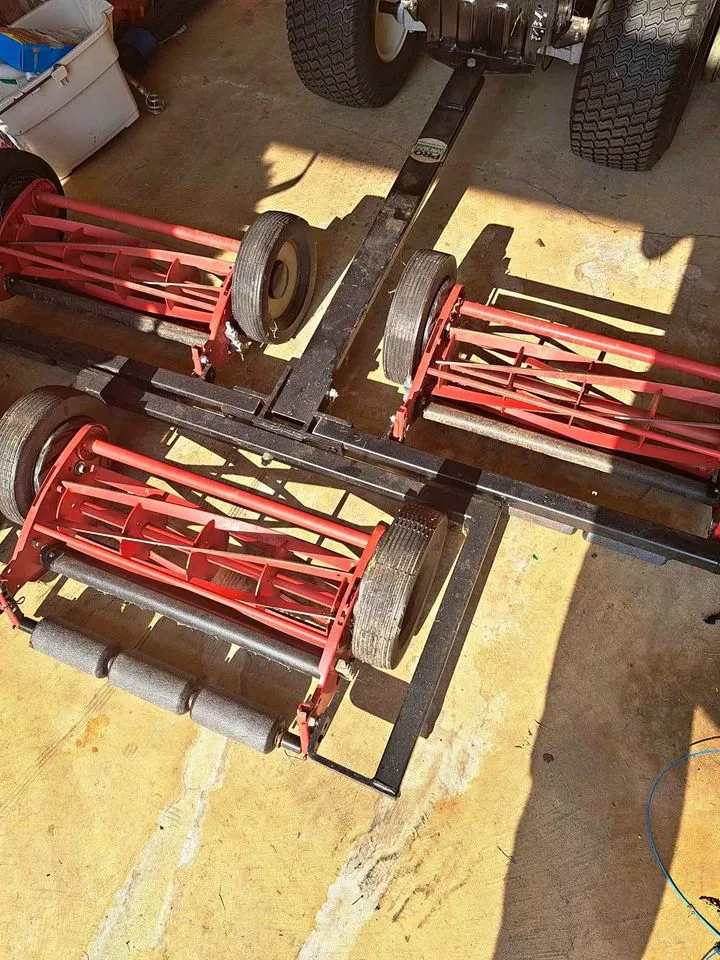
- Removing Wheels: Carefully remove the wheels of the mower to access the blades. Use the appropriate tools and remember to keep track of all parts.
- Gears Removal and Maintenance: Detach the gears carefully after removing the wheels. Inspect them for any signs of wear or damage, and lubricate them if necessary.
- Swapping Gears: Replace old gears with new ones, ensuring they are aligned correctly and properly lubricated for smooth operation.
- Reattaching the Wheels: After gear maintenance, reattach the wheels. Make sure they are clean, well-lubricated, and aligned properly for effective mowing.
- Blade Adjustment: Adjust the height and alignment of the blades as per the mower’s manual to ensure they are set correctly for sharpening.
- Sharpening Process: Apply a suitable grinding compound to the blades. Use either a hand file, whetstone, or bench grinding for sharpening, depending on your preference and the tools available.
- Backward Mowing Technique: Engage in backward mowing, a preparatory step where you manually rotate the blades backward, setting them up for effective sharpening.
- Post-Sharpening Inspection: After sharpening, inspect the blades for a consistent edge and check for any missed areas of rust or damage.
- Cleaning and Final Checks: Thoroughly clean off any grit and debris from the blades. Inspect and treat for rust, and apply lubrication to protect the blades.
- Final Wheel Attachment and Testing: Reattach the wheels, ensuring they are correctly aligned and secured. Conduct a test run to ensure the mower operates smoothly with the sharpened blades.
Related Articles:
Getting Started with Sharpening Your Reel Mower
Before I can start my reel mower sharpening, I’ve got to prep the mower for the task.
Removing Wheels
To start sharpening your reel mower, you’ll first need to remove the wheels to access the blades. It’s crucial to adhere to safety precautions before you dive in. I make sure to wear gloves and ensure the mower is stable. Here’s what I keep in mind:
- Tool Selection
- Use the right wrench for removing wheel nuts.
- Have pliers on hand for any stubborn parts.
- Wheel Maintenance Steps
- Keep track of all removed parts for easy reassembly.
- Clean and inspect the wheels; it’s a good chance for some wheel maintenance.
- Apply axle lubrication before reattaching to ensure smooth operation.
I also check the wheel alignment as I reattach them, ensuring my mower will run straight and true.
Gears Removal
Having removed the wheels, I now focus on carefully detaching the gears, which is essential for accessing the reel blades. Prioritizing safety precautions, I make sure to wear gloves to prevent any injuries.
Selecting the right tools is crucial; I use a wrench or pliers that perfectly fit the gear nuts to avoid stripping them. Slowly, I loosen the gears, paying attention to their alignment. An alignment check is vital to reassemble the mower correctly later on.
Before setting the gears aside, I inspect them for signs of wear and determine if gear lubrication is needed. Properly lubricated gears ensure a smoother operation when I put everything back together.
This meticulous gear removal and inspection set the stage for a successful sharpening job.
Swapping Gears
With the gears now removed, I’m ready to initiate the sharpening process by swapping in the new gears designed for precise blade contact. It’s a crucial step.
I know that proper gear lubrication is key to smooth operation and longevity.
Here’s my game plan:
- Gear Inspection and Maintenance
- Inspecting the gears for wear and damage before installation.
- Determining maintenance frequency based on usage and performance.
- Replacement Parts Installation
- Selecting quality replacement parts that match my mower’s specifications.
- Applying gear lubrication to facilitate seamless movement between parts.
I’m aware that skipping these steps could lead to a subpar sharpening job or even damage the mower. So, I’m as careful with these gears as a jeweler with gems.
Wheels Reattachment
Before I tackle the blade sharpening itself, I must reattach the wheels to ensure the mower’s stability and proper alignment during the process.
First, I check the tires for any signs of wear or damage. If they’re in good shape, I proceed to clean the wheels thoroughly, removing any built-up grass or debris.
Once clean, I lubricate the axle to guarantee smooth wheel rotation, which is crucial for even blade sharpening.
With the wheels ready, I focus on the wheel alignment, making sure each one is positioned correctly for optimal performance.
I then secure them onto the mower using the locking mechanism, ensuring they’re tightly fastened and won’t slip during operation.
Now, I’m all set to start sharpening the blades with the mower steady and aligned.
Blade Adjustment

To ensure the precise sharpening of your push reel mower’s blades, it’s crucial to first adjust the blade height to the correct position.
Proper height adjustment is key to maintaining mower balance and the cutting angle, directly impacting the sharpening process’s effectiveness.
Here’s how I go about it:
- Blade Alignment & Height Adjustment
- Check the manual for the optimal height for your mower model.
- Adjust each blade to this height, ensuring uniformity.
- Mower Balance & Sharpness Testing
- Make sure the mower sits level on a flat surface.
- Perform a paper test or a visual inspection to verify the initial sharpness before starting.
I find that taking these steps helps me set up for a successful sharpening session, leading to a well-maintained lawn.
Also Read: How to Change Blades on Husqvarna Zero Turn Mower
Grinding Compound Application
Before we tackle the nitty-gritty of sharpening your push reel mower, let’s discuss how to properly apply grinding compound.
This gritty substance is key to honing those blades without the need for professional equipment.
I’ll guide you through the simple steps to ensure you’re off to a great start.
Hand sharpening with a file or whetstone
Applying a generous amount of grinding compound to the blades ensures that hand sharpening with a file or whetstone is both effective and efficient.
- Blade inspection & File selection:
- Check each blade for damage before starting
- Choose the right file for your blade type
- Safety & Maintenance:
- Wear gloves for safety
- Maintain sharpening angle consistency
- Sharpen regularly based on usage
Bench Grinding
Moving on to bench grinding, the first step in sharpening your push reel mower is to apply the right amount of grinding compound to the blades.
I’m meticulous about grinding safety, always ensuring wheel selection matches my mower’s needs. Maintaining angle precision is key, so I use jigs.
I never skimp on coolant usage; it preserves the blades.
Lastly, effective dust management keeps my workspace clean and breathable.
Backward Mowing
Initiating the sharpening process for your push reel mower begins with a technique known as backward mowing. This doesn’t mean mowing in reverse, but rather a method to prep the blades for sharpening.
Here’s how I go about it:
- Backward technique
- Engage the mower in a stationary position
- Rotate the blades backward by hand
Using this approach not only sets the stage for effective sharpening but also maintains lawn health by preventing accidental cutting. It’s essential to adhere to safety precautions, like wearing gloves and ensuring the mower is secure.
For efficiency tips:
- Mowing patterns
- Clear the lawn of debris
- Check for blade movement uniformity
Post-Sharpening Appearance
Having completed the backward mowing technique, it’s crucial to recognize the signs of properly sharpened blades before diving into the sharpening process. After I’ve finished sharpening, I always do a thorough blade inspection.
I look for a consistent, polished edge along each blade, which indicates a job well done. I also check for any rust that may have been missed during rust removal. It’s important not to overlook this step, as rust can hinder the mower’s performance.
I adhere to a sharpening frequency that aligns with the mower’s use. Regular maintenance ensures I’m not met with unexpected wear or damage. Safety measures are a top priority during this entire process.
Cleaning Grit Off
Before jumping into the sharpening process, it’s essential to clean off any grit from the reel mower blades to prevent damage and ensure the sharpening is effective.
I always start with a thorough blade inspection to spot any debris or rust that may hinder my progress.
Steps for cleaning grit off:
- Blade inspection: Look for nicks and lodged debris.
- Rust treatment: Apply rust remover if necessary.
- Cleaning solutions: Use a soapy water mixture or a specialized blade cleaner.
- Drying methods: Wipe blades dry with a clean cloth or let air dry.
- Lubrication tips: Lightly oil the blades to protect against future rust.
Ensuring the blades are immaculate not only helps with sharpening but also extends the life of my mower.
Second Wheel Removal
With the blades clean, I proceed to remove the second wheel of the reel mower to gain better access to the cutting cylinder for sharpening.
I’ve made sure to choose the right tools for this job—typically a wrench or pliers—to avoid damaging the wheel or axle. Taking safety precautions, I wear gloves to protect my hands from any sharp edges or grease.
Once the wheel is off, I check the axle for wear or damage. I look out for any signs of rust, which can be a big problem.
If I spot any, I’ll treat it with rust prevention measures. It’s also the perfect time for wheel lubrication, ensuring smooth operation once I reassemble the mower.
Gears Reswap
Now that the second wheel is removed and the axle inspected, I’ll focus on the gears, swapping them out to ensure the sharpening process aligns the blades correctly.
It’s crucial to address any potential alignment issues that could affect the quality of the sharpening. Here’s how to get started:
- Gear Lubrication and Wear Inspection
- Gear Lubrication: Apply lubricant to ensure smooth gear operation.
- Wear Inspection: Check for signs of wear that could indicate the need for replacement.
- Maintenance and Adjustment
- Maintenance Schedule: Adhere to a regular schedule to prevent future issues.
- Torque Settings: Use the correct torque settings when tightening the gears to avoid over-tightening and misalignment.
Sticking to this method not only prepares my mower for sharpening but also extends its lifespan.
Final Wheels Attachment
Reattaching the wheels marks the final step before I begin the meticulous task of sharpening the reel mower blades.
First, I ensure wheel lubrication isn’t overlooked—it’s crucial for smooth operation. I dab just the right amount of grease on the axles, not too much to attract dirt.
During the axle inspection, I check for any signs of wear or damage. It’s key to catch any issues now to prevent future mishaps.
Next, I carefully align the wheels, making sure they’re set just right. An alignment check guarantees they roll straight, which is essential for an even cut.
Once they’re securely on, I perform a final testing, pushing the mower a few feet to ensure everything’s in place. Of course, I don’t forget the safety precautions—keeping my fingers clear of the blades at all times.
Signs your lawn mower blades need sharpening
How can you tell when your reel mower’s blades have dulled and are in need of a sharpening? There are a few telltale signs that don’t lie about blade dullness:
- Uneven Cuts: If you’re noticing that your lawn looks like a patchy, uneven mess after a mow, that’s a red flag.
- Grass blades are torn instead of cleanly sliced.
- You see more stragglers left behind than usual.
- Slow Mowing Experience: When it takes more effort to push the mower or you have to go over the same spot multiple times, you’re definitely dealing with dull blades.
- The mower seems to resist moving forward smoothly.
- You find yourself working harder but achieving less.
Other signs include frequent jams, where the mower just refuses to cooperate, often getting stuck on twigs or thicker patches of grass. This isn’t just annoying; it’s a sign that the blades aren’t cutting as they should.
Plus, if you care about grass health, remember that dull blades can damage your lawn, leaving it vulnerable to disease and pests. It’s clear then, keeping those blades sharp isn’t just about a good-looking lawn, but a healthy one too.
Read More: Best Blades for Bad Boy Mower: 2024 Guide
The importance of sharpening lawn mower blades
Maintaining sharp blades on your reel mower is crucial for ensuring a clean, efficient cut every time you mow. Dull blades tear rather than slice, stressing the grass and making your lawn more susceptible to disease.
Sharp blades, on the other hand, promote grass health by cutting cleanly, which allows for quicker healing and less chance for pests or diseases to set in.
I’ve found that sharpening frequency directly impacts mowing efficiency and blade longevity. Regularly sharpened blades mean I don’t have to pass over the same area multiple times, saving me both time and effort.
Plus, sharp blades reduce the wear and tear on the mower itself, extending the overall life of the equipment.
Blade longevity isn’t just about saving money; it’s also tied to safety precautions. A sharp blade is predictable and reduces the risk of the mower getting jammed or causing an accident.
Dull blades can catch on thick grass, creating a hazard during mowing.
I make sure to wear protective gloves and follow the manufacturer’s instructions when sharpening the blades. Taking these safety precautions protects not just the mower’s blades, but also my own well-being.
Sharpening Tips and Techniques
From adjusting the sharpening angles based on grass type to ensuring the longevity of blades with regular honing rod use, each technique is designed to optimize your mower’s performance.
Sharpening Angles Based on Grass Type
When sharpening reel mower blades, it’s beneficial to consider the type of grass you’re cutting, as different grass types may require different blade angles. For softer prairie grasses, a smaller bevel angle, say around 30 degrees or less, is often recommended.
This angle ensures a cleaner cut, which is gentle on the grass and facilitates quicker healing. Conversely, tougher or thicker grass types might need a slightly steeper angle for effective cutting.
Adjusting the sharpening angle to match the grass type can significantly enhance your mower’s efficiency and the overall health of your lawn.
Using a Honing Rod for Blade Maintenance
Regular maintenance of reel mower blades can be efficiently managed using a honing rod. To use a honing rod, hold the blade at a 45-degree angle, and gently run the rod along each side of the blade.
This method is particularly useful for keeping the blades sharp between more intensive sharpening sessions. It’s important to be cautious not to remove too much material from the blade edges, as this could lead to injuries or damage to the mower.
Consistent use of a honing rod can prolong the life of your blades and ensure a consistently clean cut.
Bedknife Maintenance and Sharpening
The bedknife is a crucial component of the reel mower, playing a significant role in the cutting process. Maintaining and sharpening the bedknife involves several steps. First, remove the bedknife and use a scraper to clean off any rust, scale, and corrosion.
When reinstalling the bedknife, it’s important to lightly oil its surface and use new screws with anti-seize lubricant applied to the threads. Avoid overtightening the screws and follow the manufacturer’s instructions for the correct torque.
Regular maintenance of the bedknife, including proper cleaning and lubrication, ensures optimal cutting performance and longevity of your reel mower.
Sharpening Blades with Sandpaper
Sandpaper can be an effective tool for sharpening reel mower blades, especially for smoothing out minor nicks and rough spots. To sharpen blades with sandpaper, first remove the blade from the mower.
Lay the sandpaper on a flat surface and place the blade on top. Carefully sand off any rough patches on one side of the blade, ensuring you maintain an even and smooth surface.
After smoothing one side, flip the blade and repeat the process on the other side.
This method is particularly useful for fine-tuning the blade’s sharpness and can be a practical and accessible option for those who may not have specialized sharpening tools.
It’s important to handle the blades carefully during this process to avoid any injuries.
Cost of Professional Sharpening Services
The cost of professional sharpening services for reel mowers can vary, depending on the complexity of the blades and the expertise of the sharpener. On average, a basic sharpening session for a standard reel mower might cost around $30.
However, for reel mowers with more complex blade systems, like those found in riding lawnmowers, the price could increase, possibly reaching upwards of $60.
For electric reel mowers, particularly if the blade is damaged or rusty, professional sharpening could cost between $50 and $100. These figures provide a general guideline, but it’s always best to check with local services for precise quotes.
Our Verdict
In my journey through the meticulous world of maintaining and sharpening reel mower blades, I’ve learned that the effort is absolutely worth it.
My personal experience has shown me that a well-maintained blade is not just a tool but a key to a lush, vibrant lawn. It’s been a transformative process, shifting from tedious lawn care to enjoying the serene beauty of a well-manicured lawn.
Each turn of the blades, each adjustment, and careful sharpening, have taught me the importance of attention to detail.
Whether it’s selecting the right angle for different grass types, using a honing rod for regular maintenance, or even the simple act of sanding the blades for that perfect finish.
As I stand back and look at the fruits of my labor, a green expanse that’s become the envy of my neighborhood, I can confidently say that the journey of sharpening and maintaining my reel mower has been as rewarding as the result.
Your grass, much like mine, will thrive with this care, reflecting the pride and effort put into every blade’s sharpen.
Frequently Asked Questions
Can I sharpen my reel mower blades without removing them from the mower?
Yes, I can sharpen the blades without removing them by following manual methods, ensuring safety precautions, and conducting blade inspection and adjustment checks. Regular sharpening frequency keeps my mower in top condition.
How often should I apply lapping compound during the sharpening process?
I’ll adjust lapping frequency based on the blade’s dullness. Optimal intervals ensure thorough sharpening duration. I choose compound types carefully for effective blade maintenance, applying more if the blades aren’t sharpening properly.
What are the risks of over-sharpening reel mower blades?
Over-sharpening can cause blade brittleness and metal fatigue, compromising cutting precision. I’ll need to sharpen more often, increasing maintenance frequency, so I’m careful with my sharpening techniques to avoid these risks.
Is it possible to sharpen reel mower blades too much, and what are the consequences?
Yes, I can over-sharpen my blades, leading to brittleness and reduced edge durability. It disrupts the maintenance balance, affects cutting precision, and demands increased sharpening frequency, which I’d rather avoid.
Can the use of a power drill for sharpening reel mower blades damage the blades or affect the mower’s performance?
Using a drill for precision tasks can risk blade integrity due to heat generation. If I’m not careful with alignment and drill bit selection, it might indeed affect my mower’s performance.